- Introduction
- How to Use "Camera Shots and Angles"
- Exploring Camera Shots and Angles
- Camera Shot Size
- Extreme Wide Shot (ELS)
- Long Shot (LS) / Wide Shot (WS)
- Full Shot (FS)
- Medium Long Shot (MLS) / Medium Wide Shot (MWS)
- Cowboy Shot
- Medium Shot (MS)
- Close-Up (CU)
- Medium Close-Up (MCU)
- Extreme Close-Up (ECU)
- Establishing Shot
- Camera Shot Focus
- Shallow Focus
- Deep Focus
- Tilt-Shift
- Soft Focus
- Split Diopter
- Camera Shot Angles
- Eye Level Shot
- Low Angle Shot
- High Angle Shot
- Hip Level Shot
- Knee Level Shot
- Ground Level Shot
- Shoulder-Level Shot
- Dutch Angle Shot
- Birds-Eye-View Shot / Overhead Shot
- Aerial Shot / Helicopter Shot
- Final Thoughts
Introduction
ArtSmart offers a diverse range of prompt styles (learn more: Prompt Designer: Elevate Your AI Artistry) to enhance your creative process.
One of the exciting prompt styles available is "Camera Shots and Angles". This prompt style focuses on capturing various perspectives and compositions commonly used in cinematography.
By using this prompt style, you can explore different camera shots and angles to add depth, drama, and storytelling elements to your generated images.
How to Use "Camera Shots and Angles"
- Open the ArtSmart Playground and navigate to the Prompt Designer panel
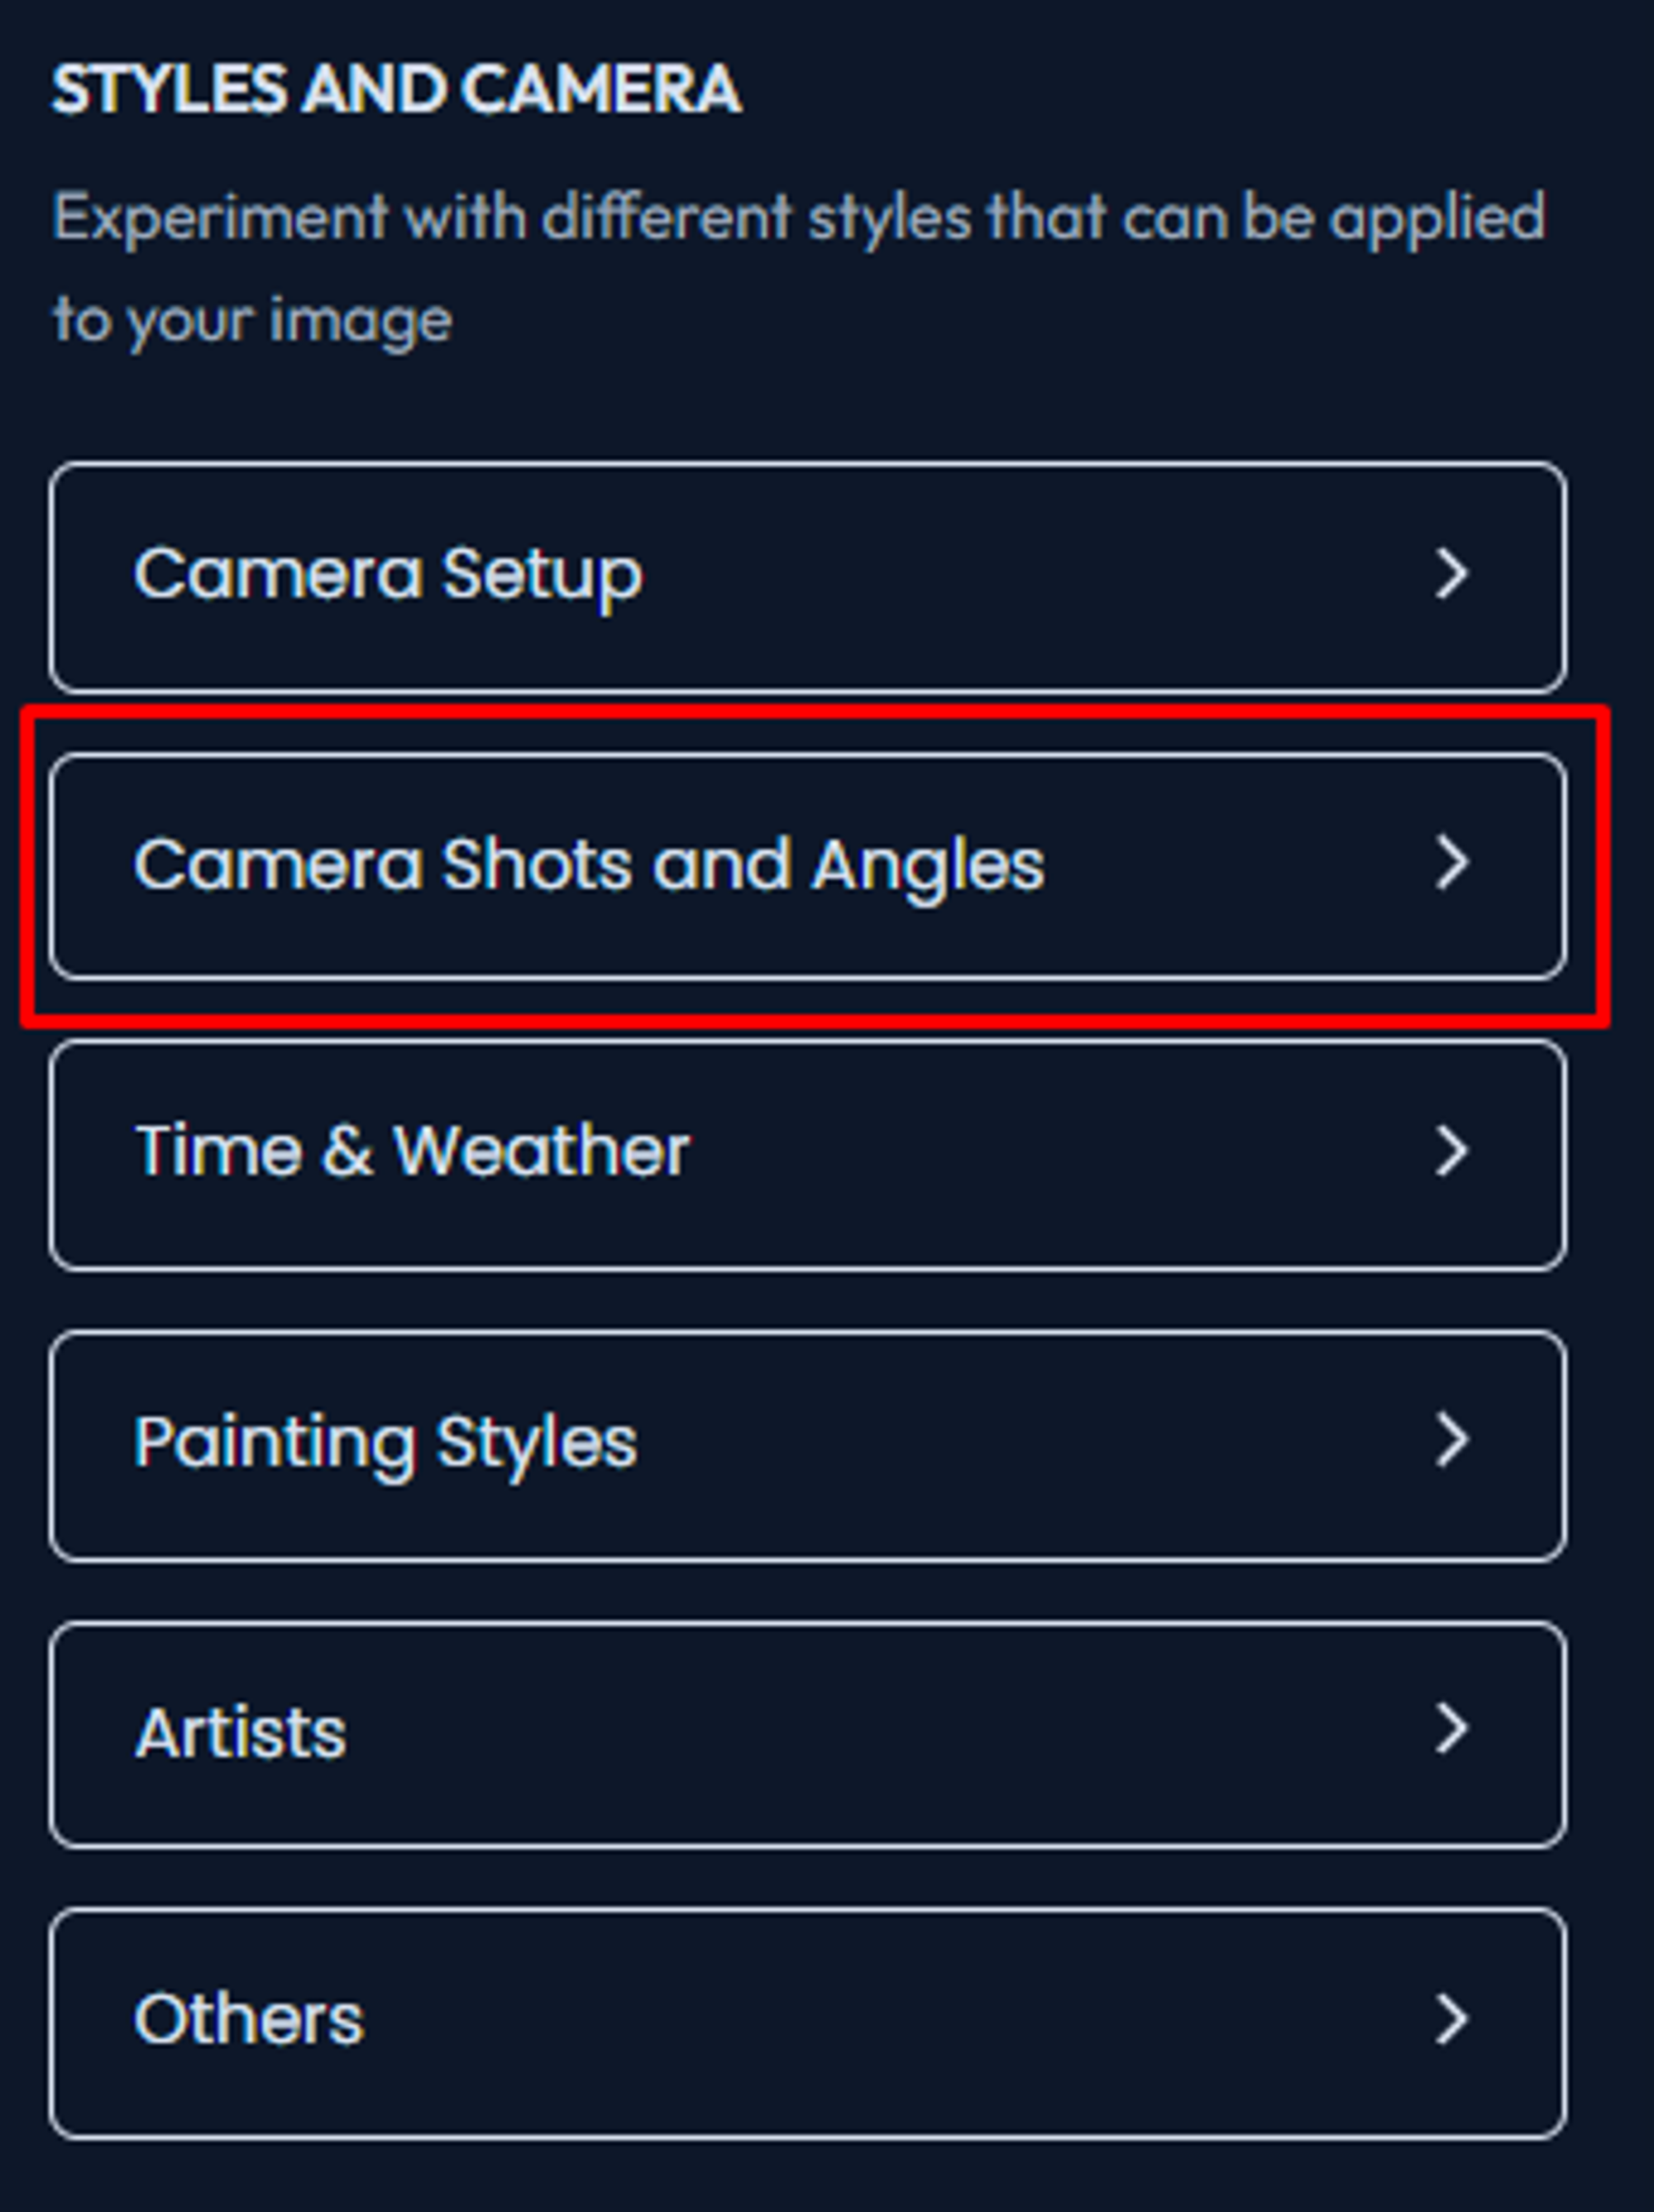
- In the "STYLES AND CAMERA" section, click on the "Camera Shots and Angles" menu
- Scroll down and select the desired camera shot size, camera shot focus, and camera shot angle from the available options.
The prompt box will update with the selected prompt style, providing a set of camera shot and angle options.
Result prompt:

Exploring Camera Shots and Angles
A camera shot or angle defines the framing of a photo. Artsmart.ai understand much of the photography and film vocabulary to help you produce the camera framing, angles and shots
Camera Shot Size
There are different types of camera shot sizes.
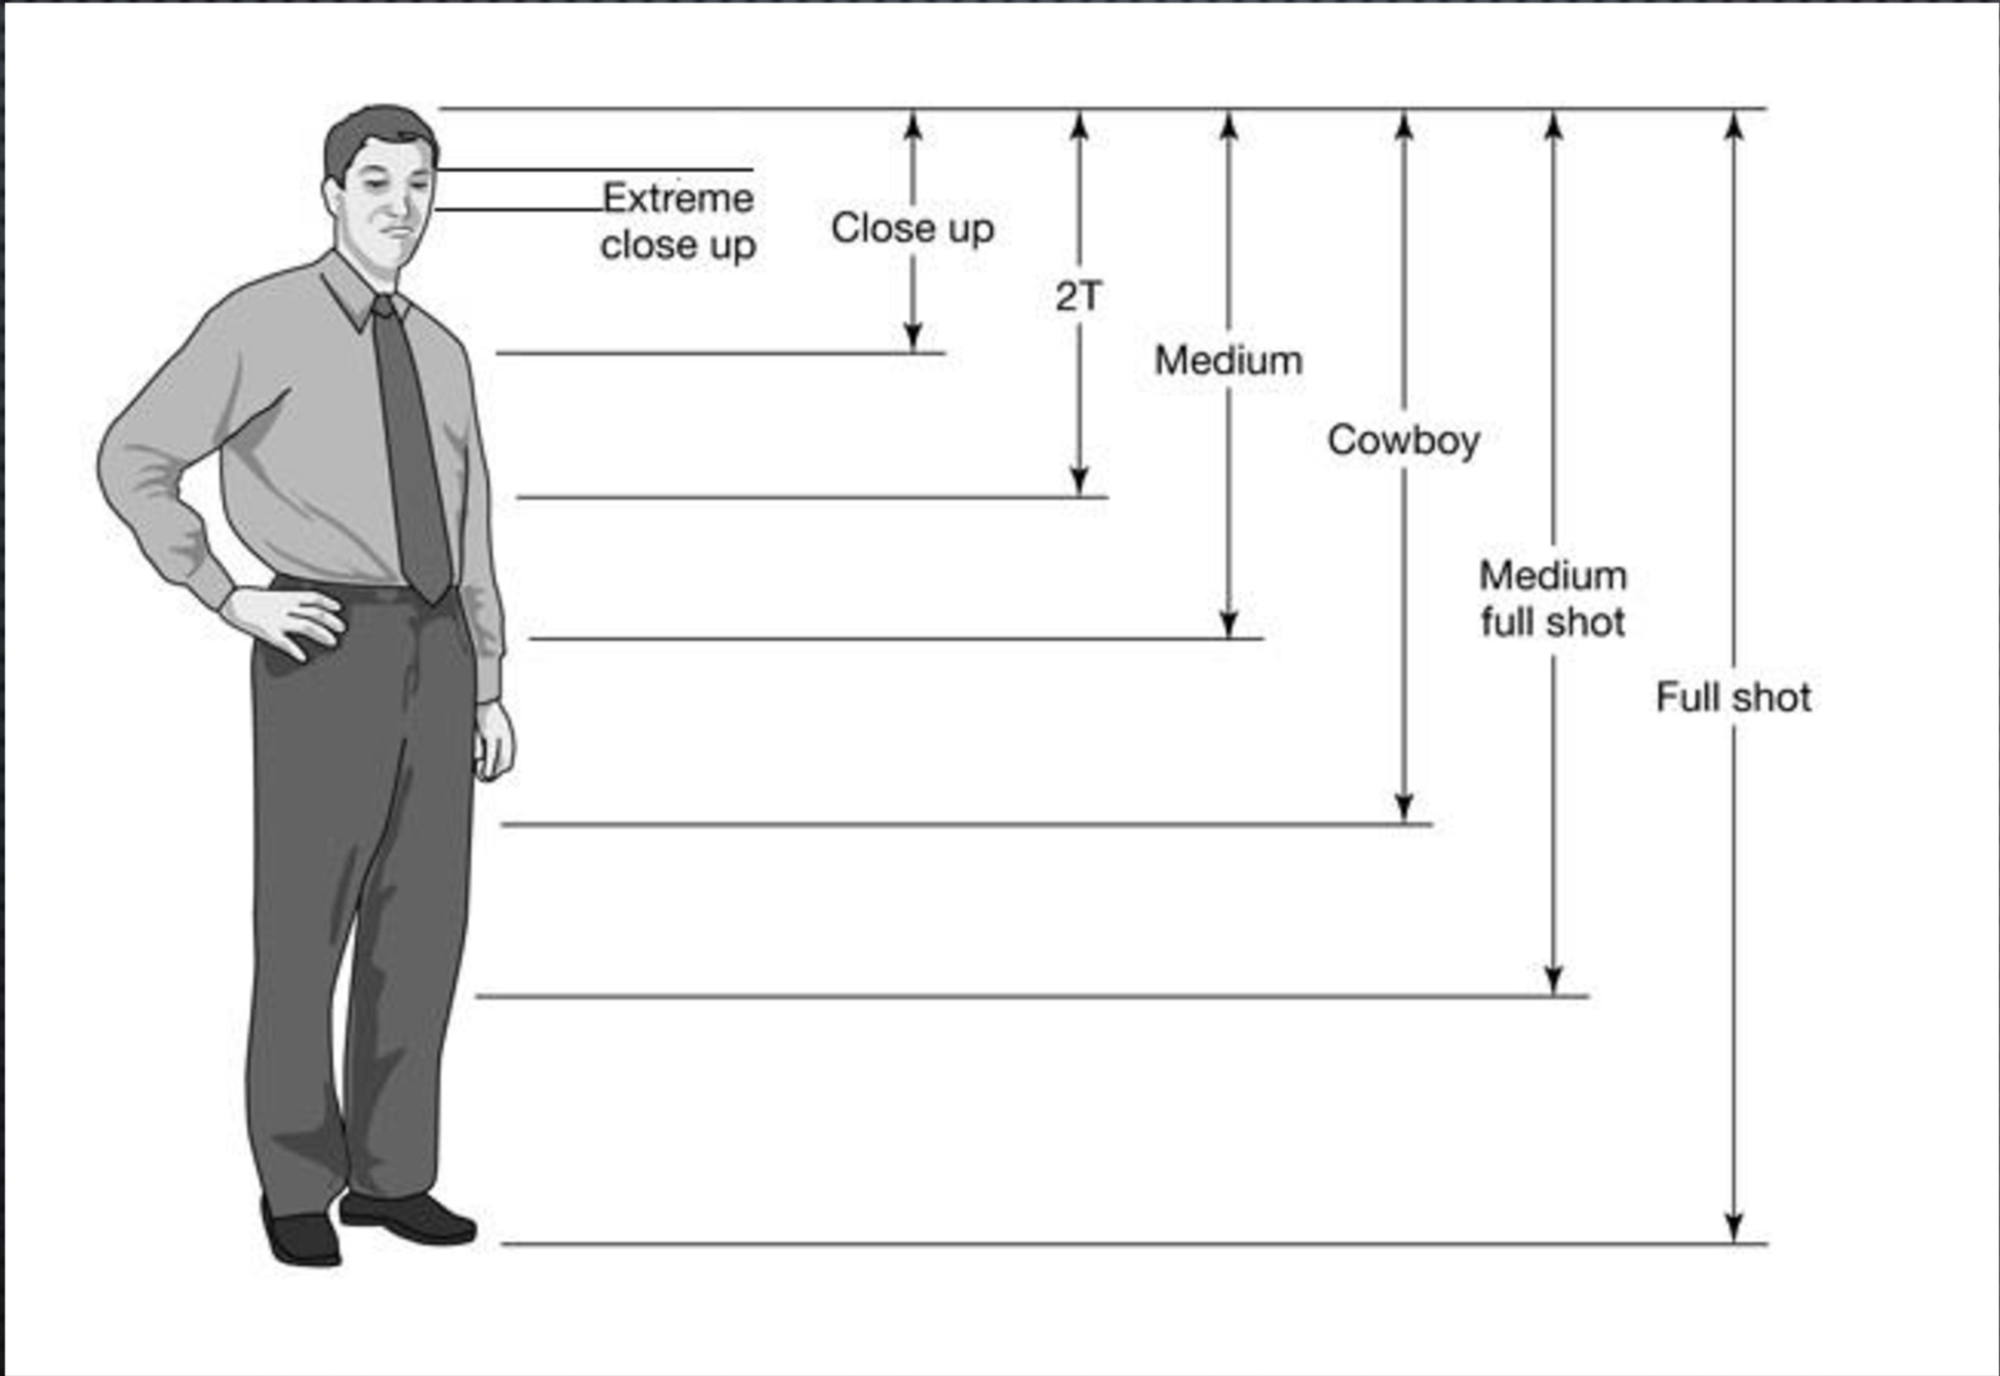
Artsmart has created a clickable cheat-seat in app to help remind you of the terminology!
Below you’ll find a quick overview of what each of these terms means
Extreme Wide Shot (ELS)
If you want the subject to seem smaller than the location, go with the extreme long or extreme wide shot.
Extreme long shots are also perfect for making your subject appear distant or unfamiliar.
Check out this extreme wide shot from Django Unchained:
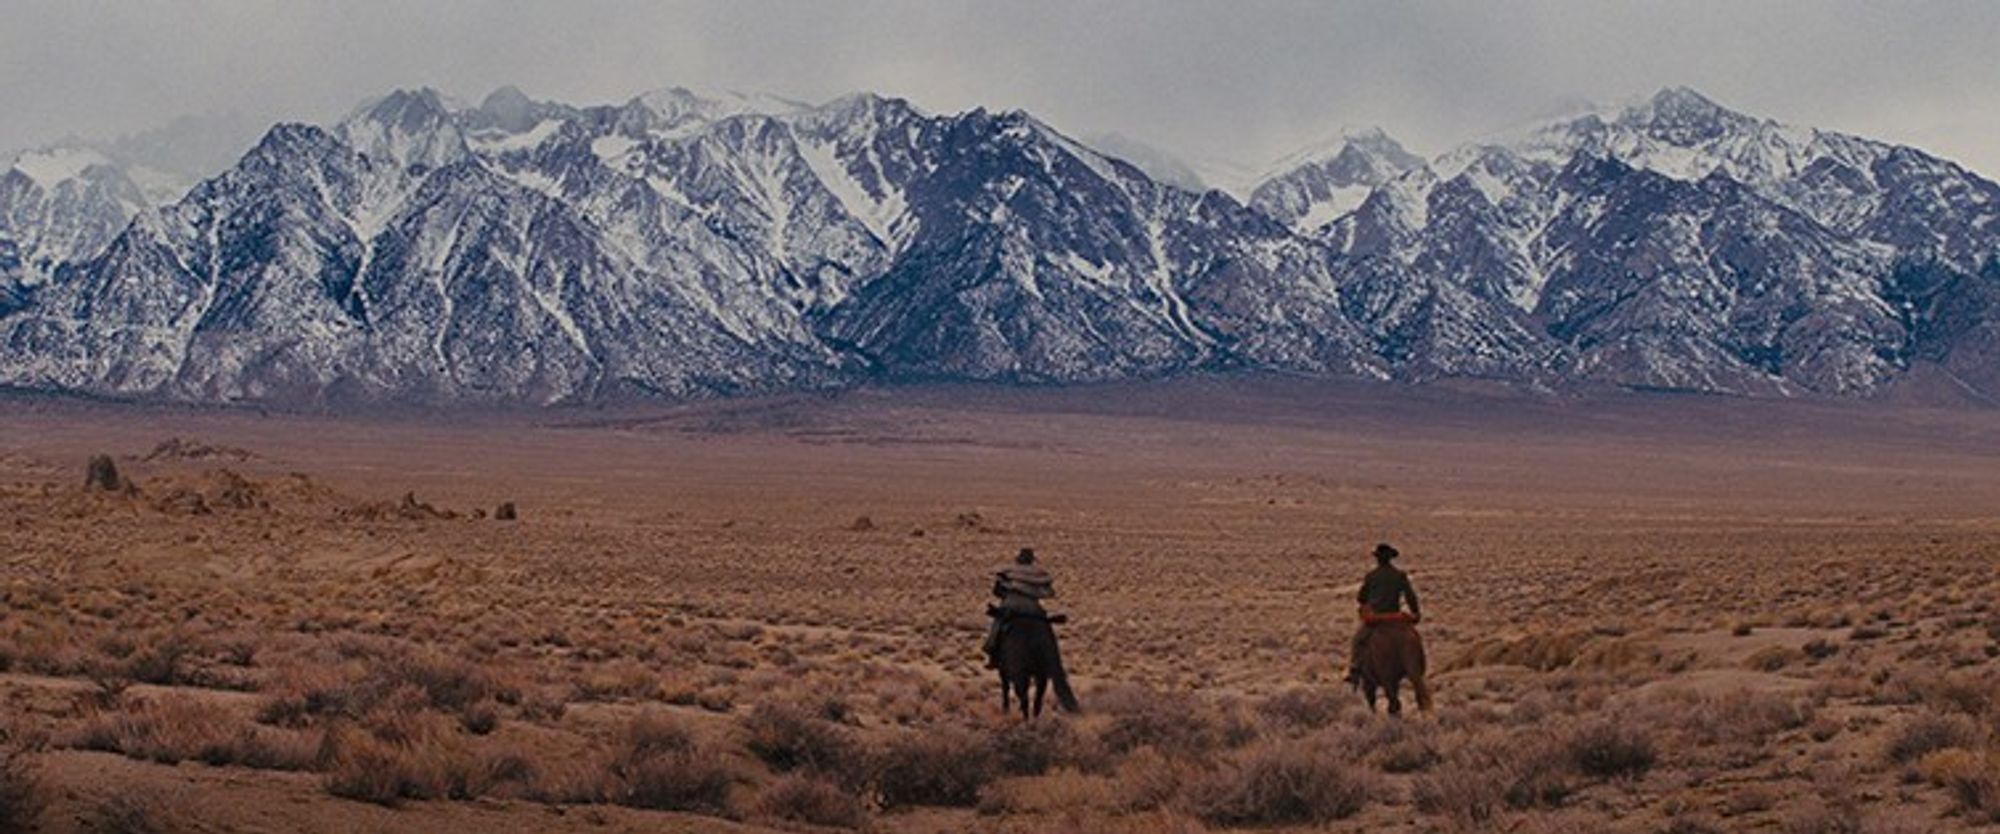
See how they emphasized the location?
You can feel how small those people felt compared to their surroundings.
Long Shot (LS) / Wide Shot (WS)
A long or wide shot is basically the same as the extreme wide shot but a bit closer.
So, if you focus on a person, their whole body will be in view but won’t be the only thing in the shot.
As in this shot from Days of Heaven:
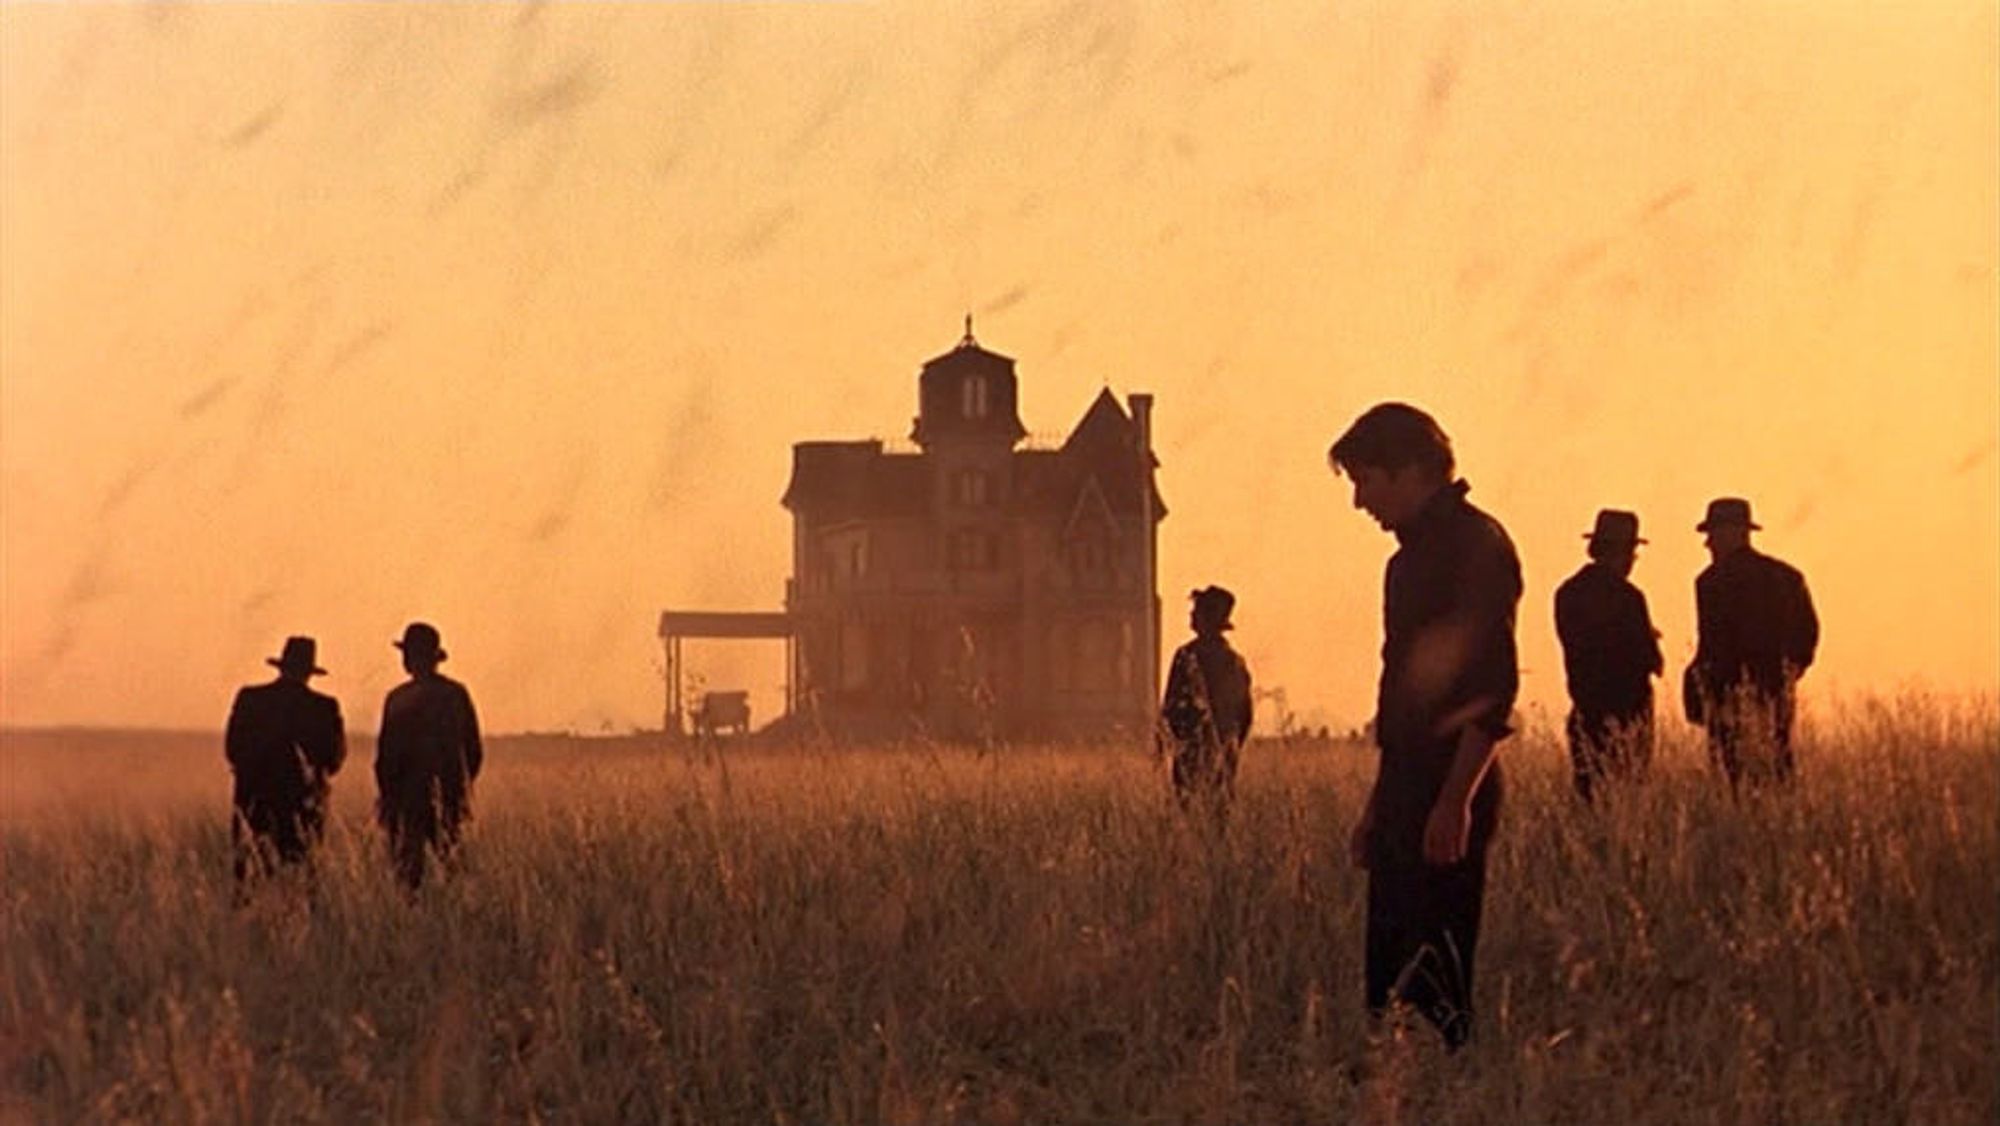
So, there should be quite a lot of space around the subject.
The wide shot showcases the background imagery while keeping the subject in focus. It also allows us to see characters who are about to make a big moment more cinematic.
This type of shot gives us a better view of the scene setting and tells us how the character fits into the area.
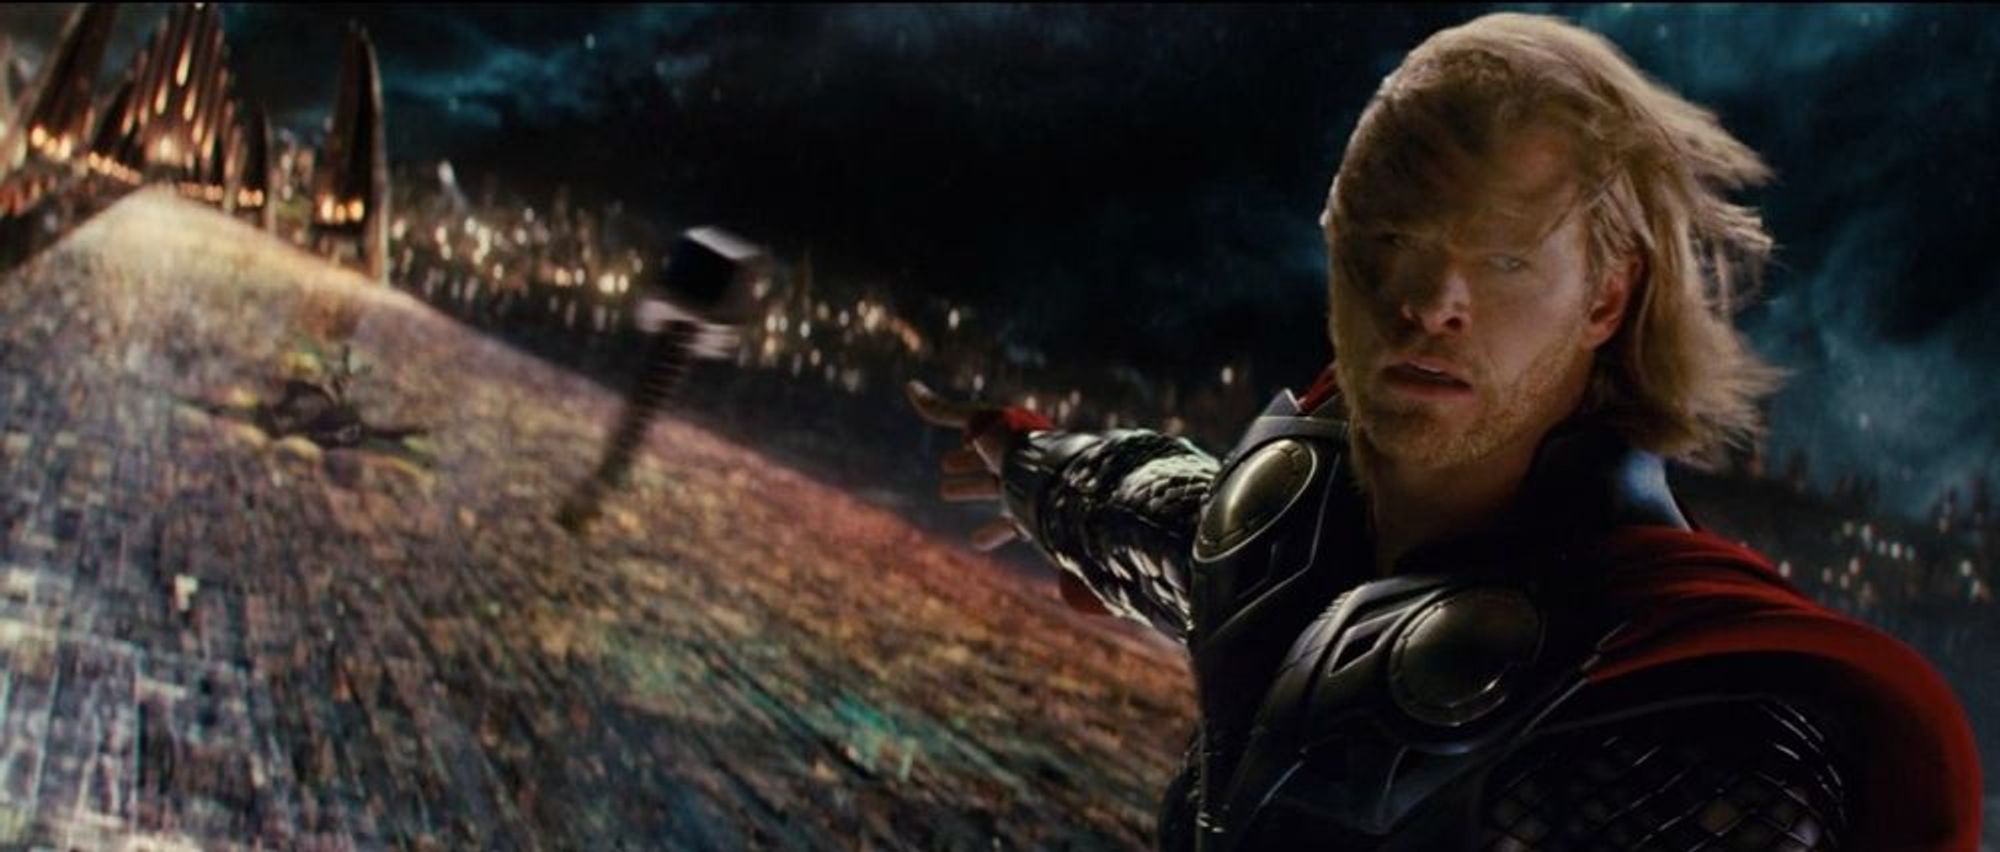
Full Shot (FS)
This is another camera shot that allows the subject to fill the frame, but the emphasis still remains on the scenery.
Just look at this impressive shot from Thor:
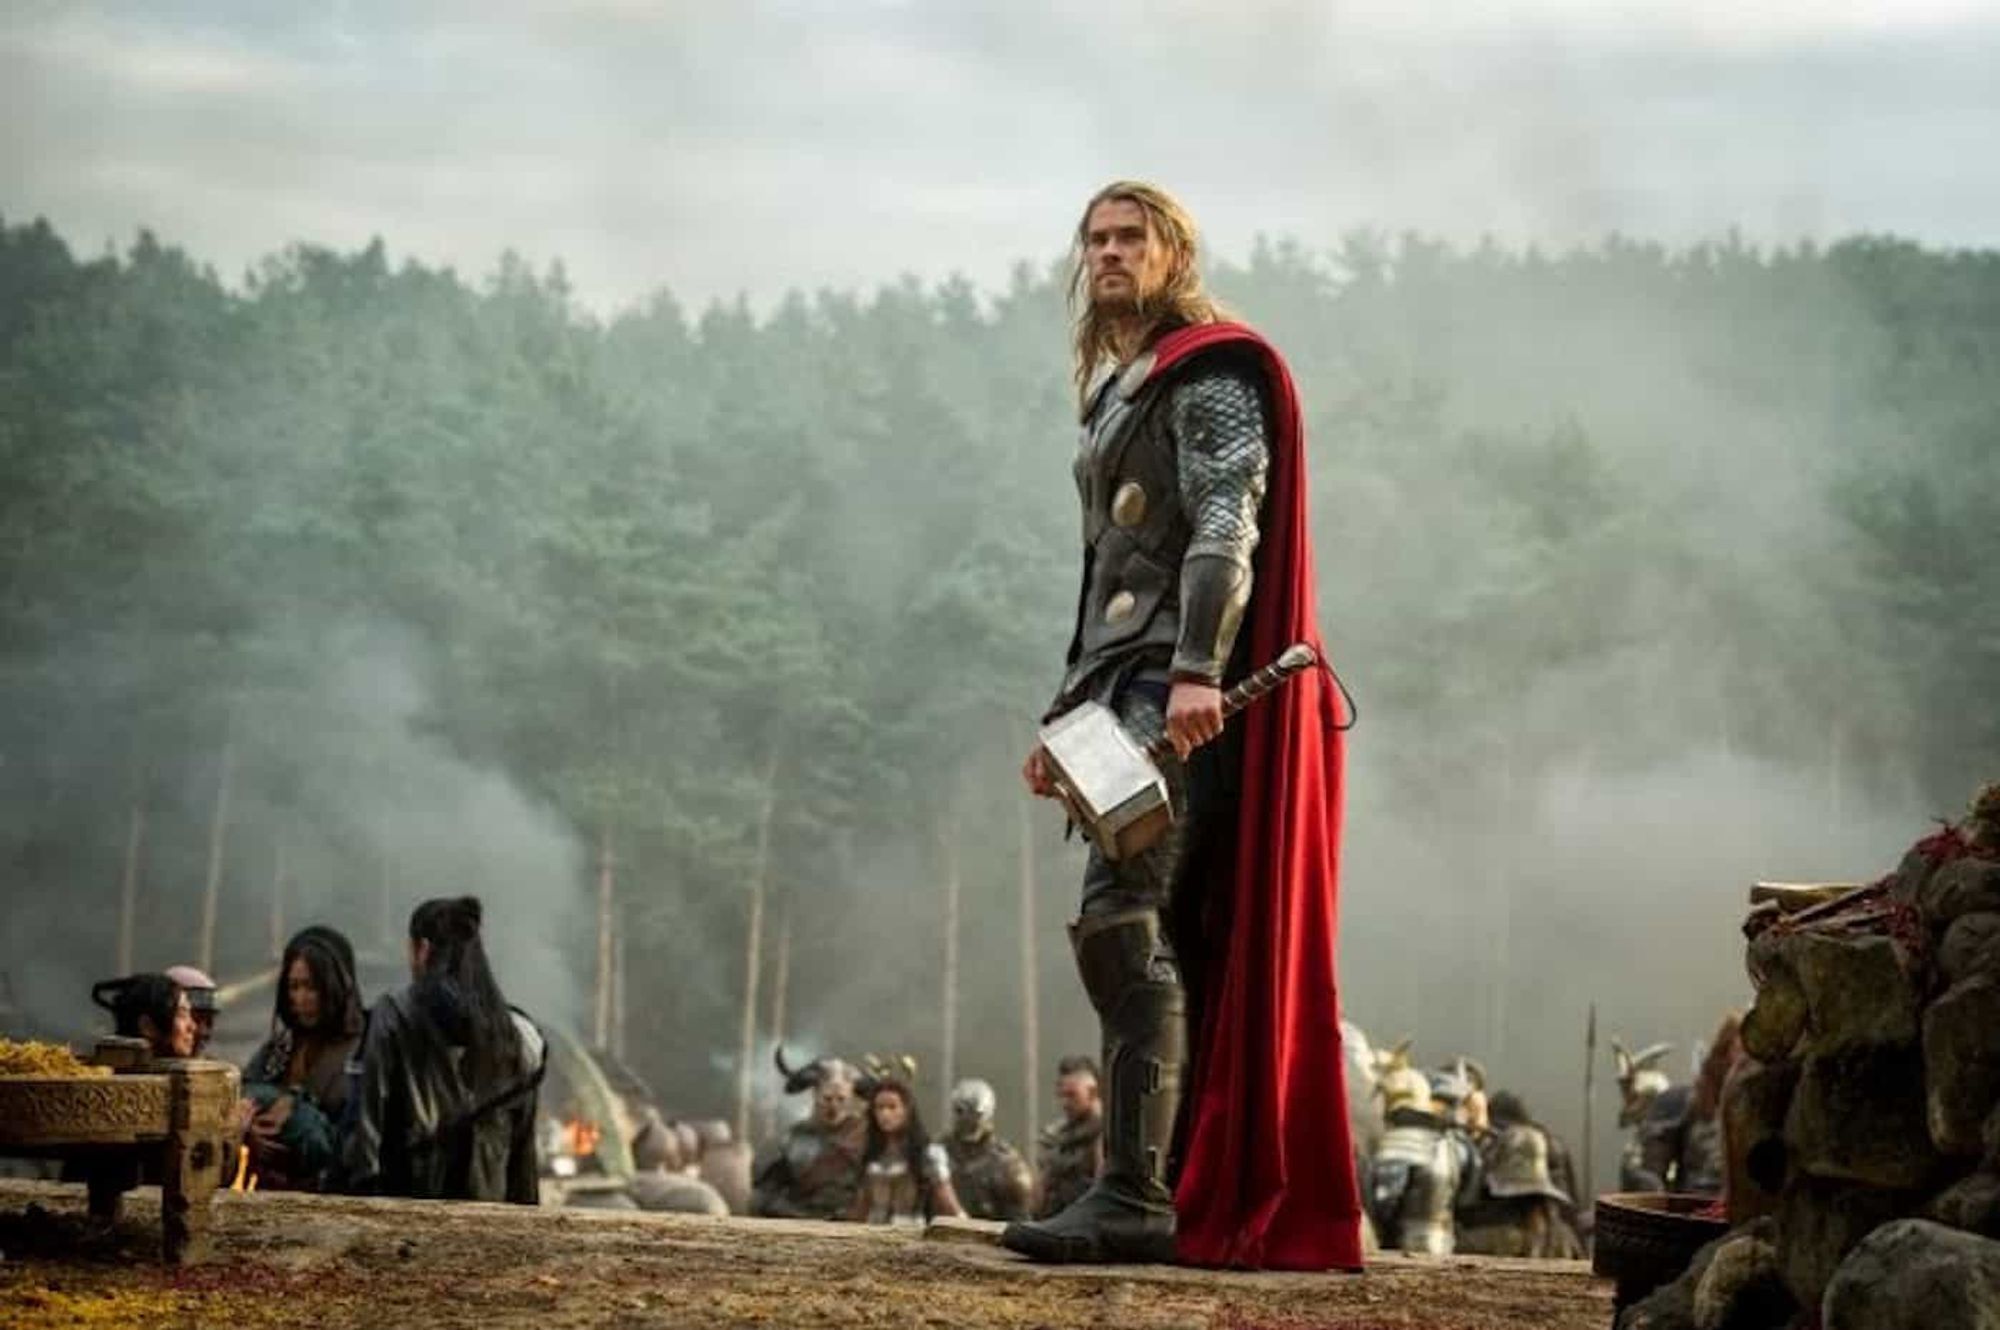
This shot is different from the wide shot as it focuses on the character in the frame.
The character is again full body, but the setting is no longer focused.
You can use it to show how a character moves (confidently, awkwardly, etc.), how a character dresses, or what they are doing (packing a suitcase, buying a plane ticket).
Medium Long Shot (MLS) / Medium Wide Shot (MWS)
A medium long/wide shot shows the character from knees up. It’s somewhere in between a full and a medium shot.
A perfect example is this pic from Wonder Woman:
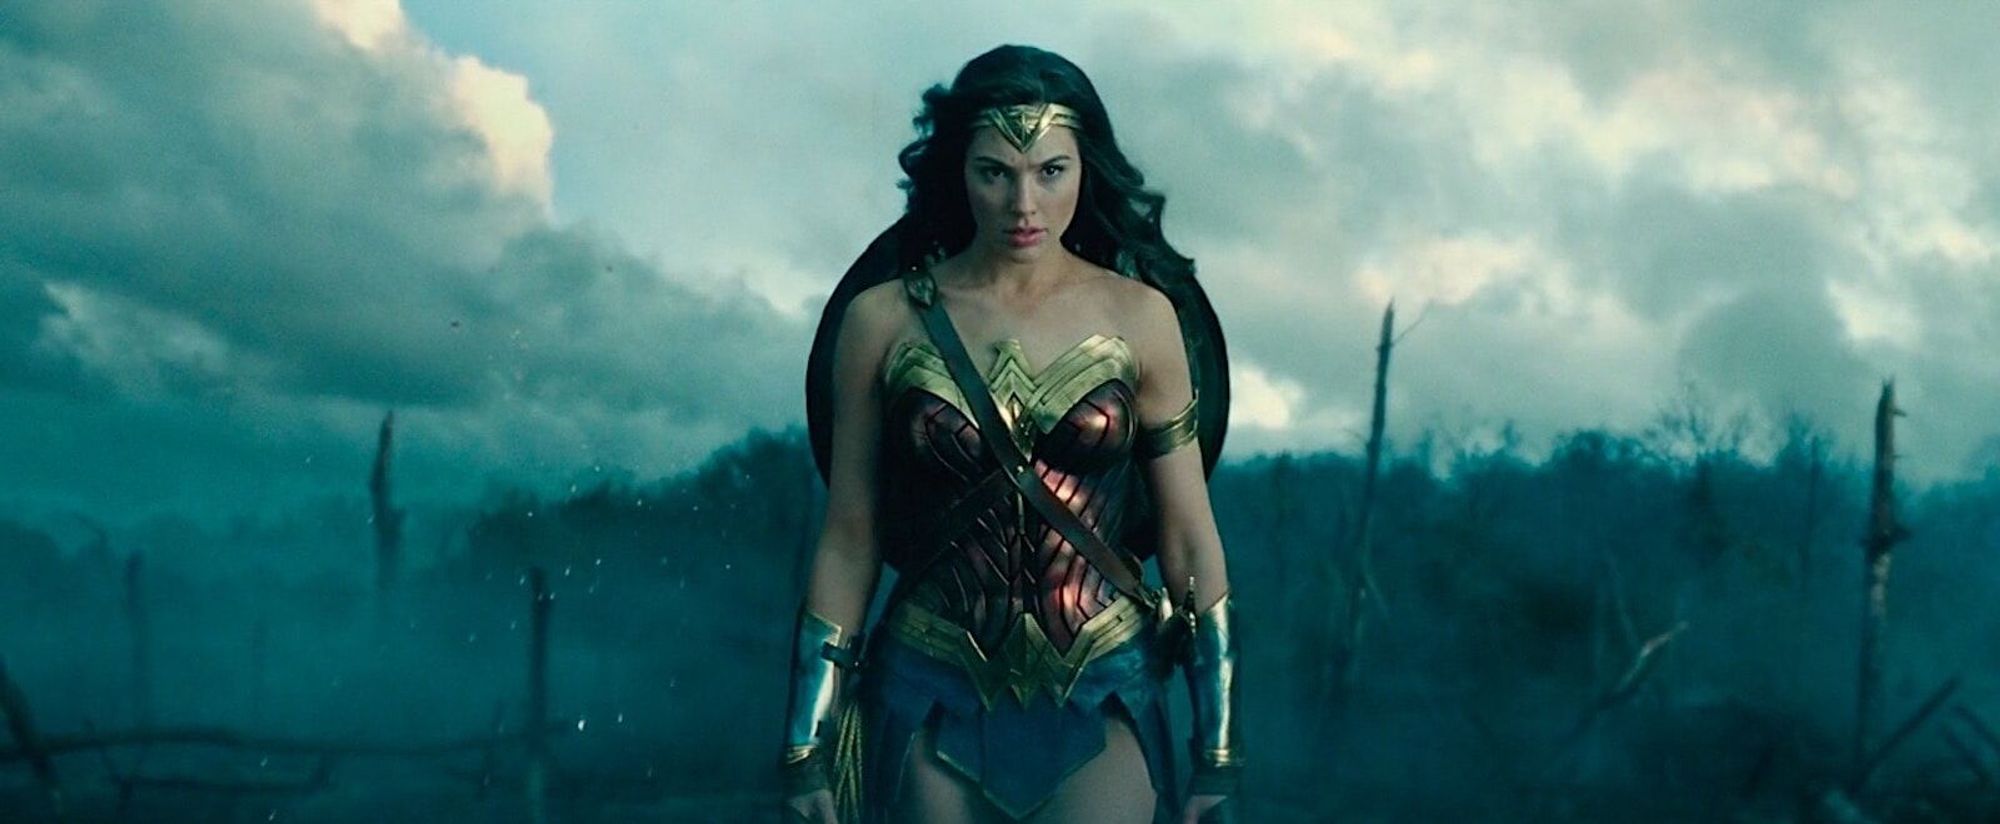
The medium shot is great for dialog scenes. We get closer to the character and see things we wouldn’t notice in a wide shot, like body language or facial expressions.
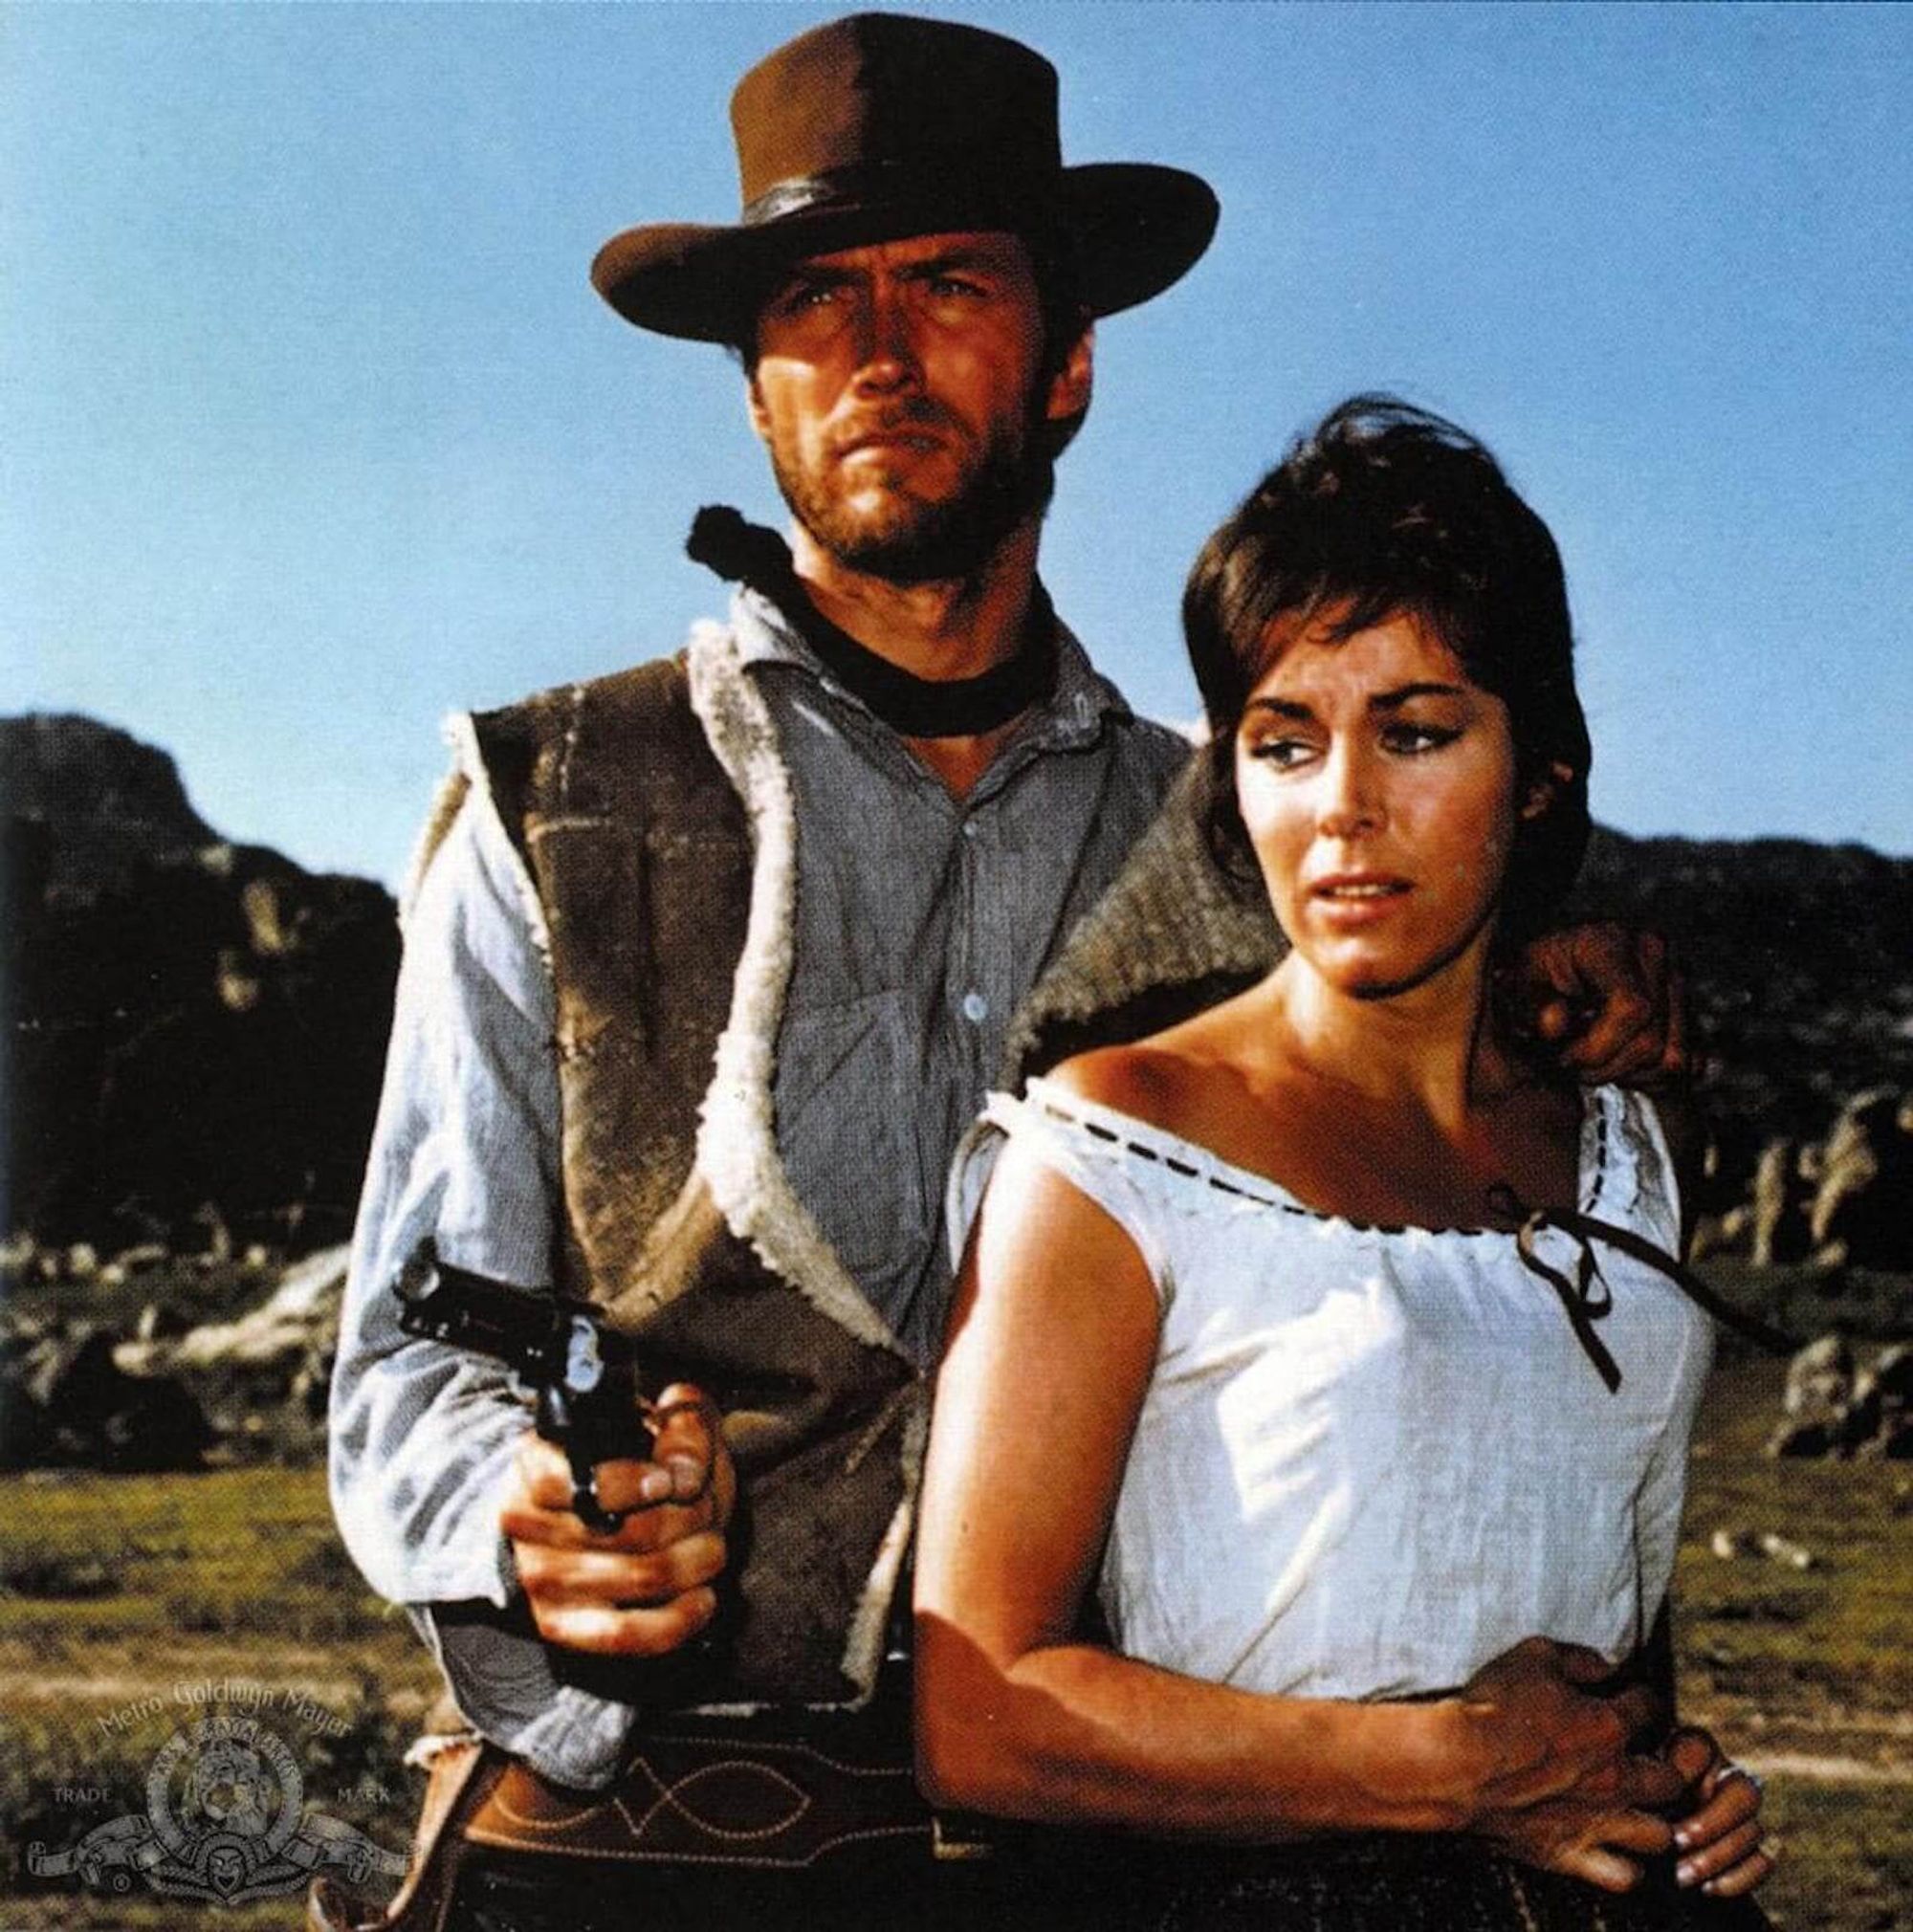
Cowboy Shot
This shot is a variation of the medium shot.
The cowboy shot shows the character from the waist or hip up. It got its name from the old western movies where it was most used.
Again, this shot reveals more information than the wide one. In western movies, producers used it to show the gun holsters on cowboys’ hips. If you couldn’t see the hips, you’d lose a lot of important contexts. As in this shot from A Fistful of Dollars:
Medium Shot (MS)
Now, we move on to the camera shots that reveal the character in more detail.
The medium shot is among the most common ones out there. It frames the character roughly from the waist up and through the torso, emphasizing the subject yet showing the surroundings.
Here's an example from Titanic:
.jpg?id=d5a237b6-35a0-41fb-9a8c-e4fd585982ae&table=block)
Close-Up (CU)
When you want to show a character’s emotions and reactions, it’s time for a close-up.
That’s the shot where the whole frame is filled with a part of a character (often their face).
Here’s how it looked in The Shining:
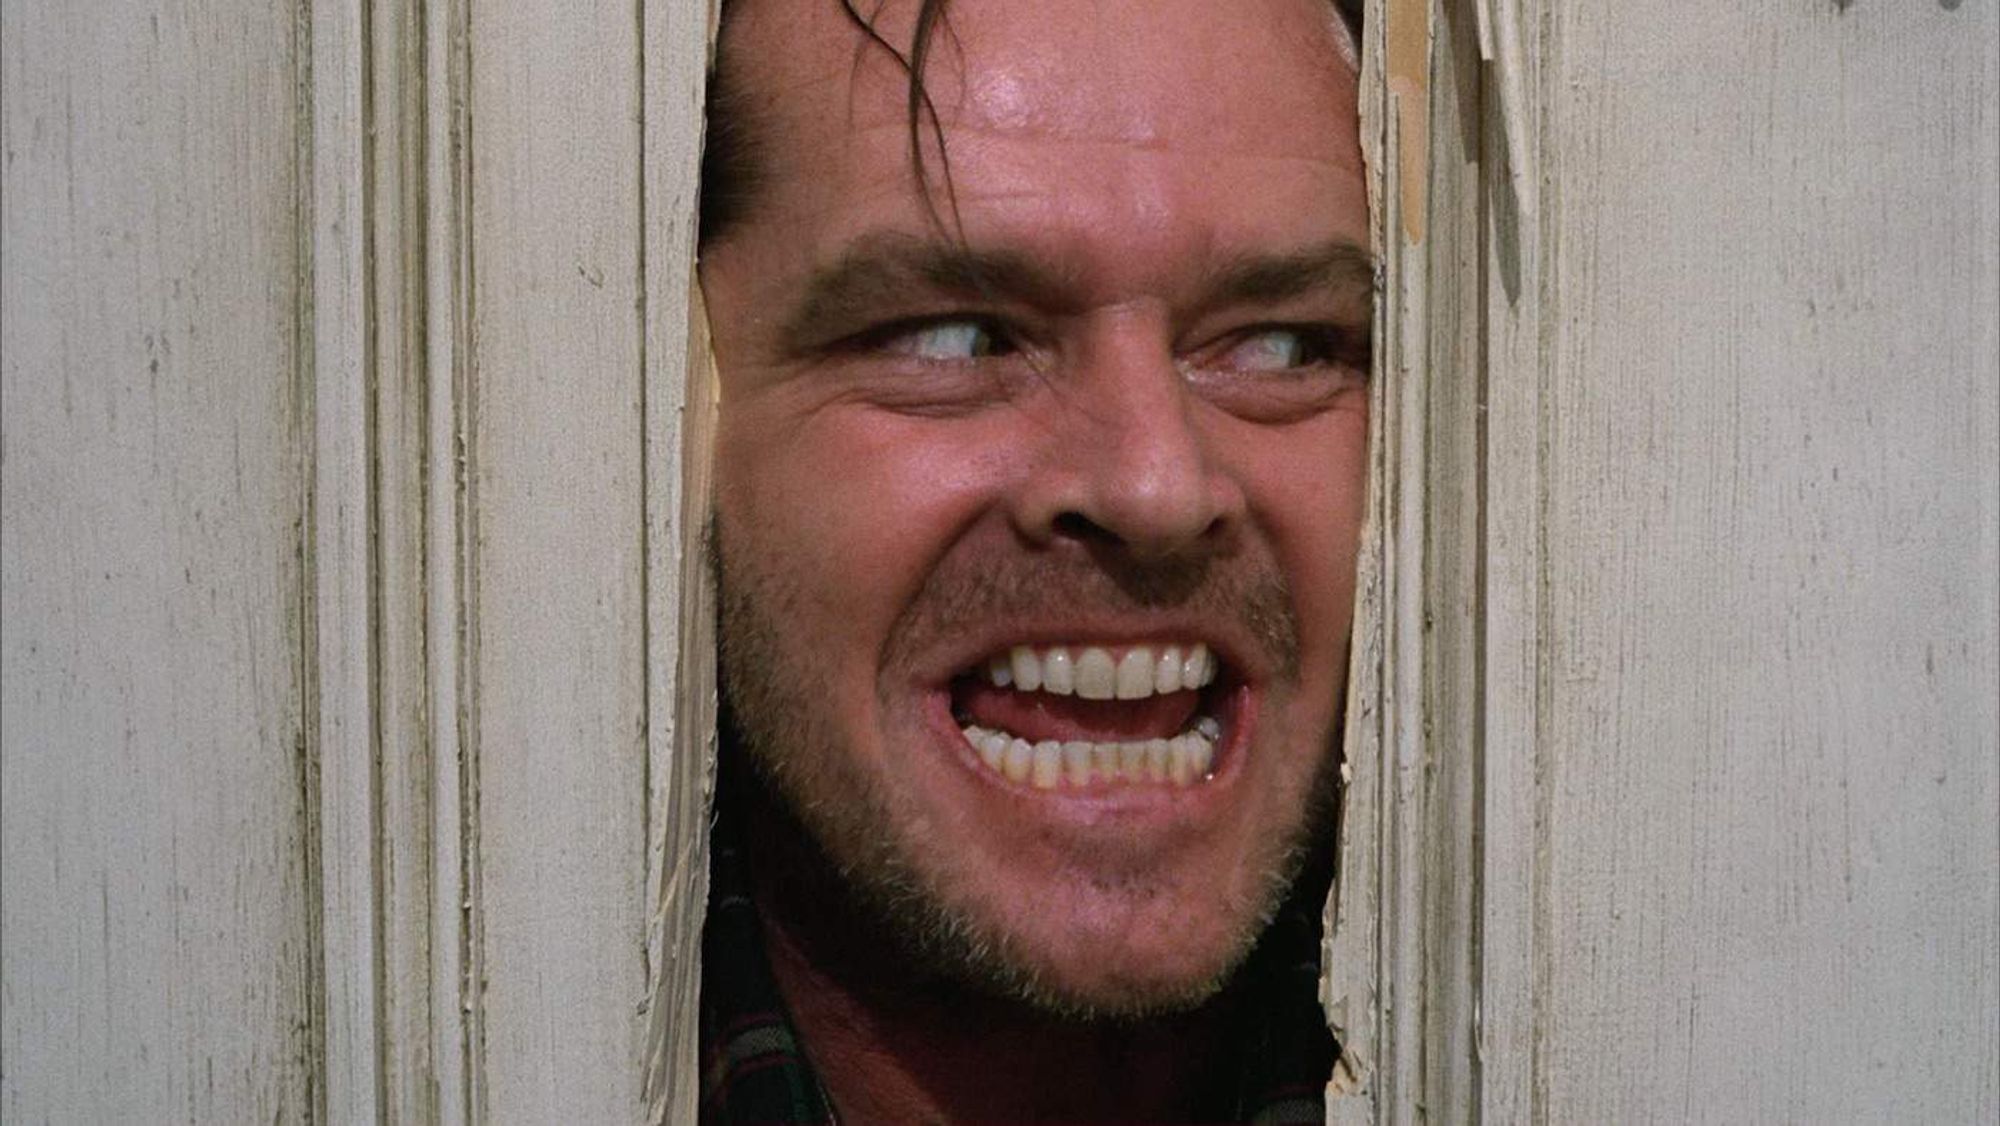
A close-up is made for important moments. It’s close enough to show all the emotions, yet not too close so that we lose the sense of surrounding.
Medium Close-Up (MCU)
The cross between medium shot and close-up is the medium close-up. This frame shows the body language while capturing some emotions and facial expressions.
If you want to build up to an emotional climax, you should definitely go with this shot.
This scene from Scream shows the medium close-up perfectly:

Extreme Close-Up (ECU)
Extreme close-ups fill a frame completely with the subject. They most often frame eyes, mouths, and gun triggers. The focal point is the smaller object, shown in great detail.
As in this scene from Requiem for a Dream:
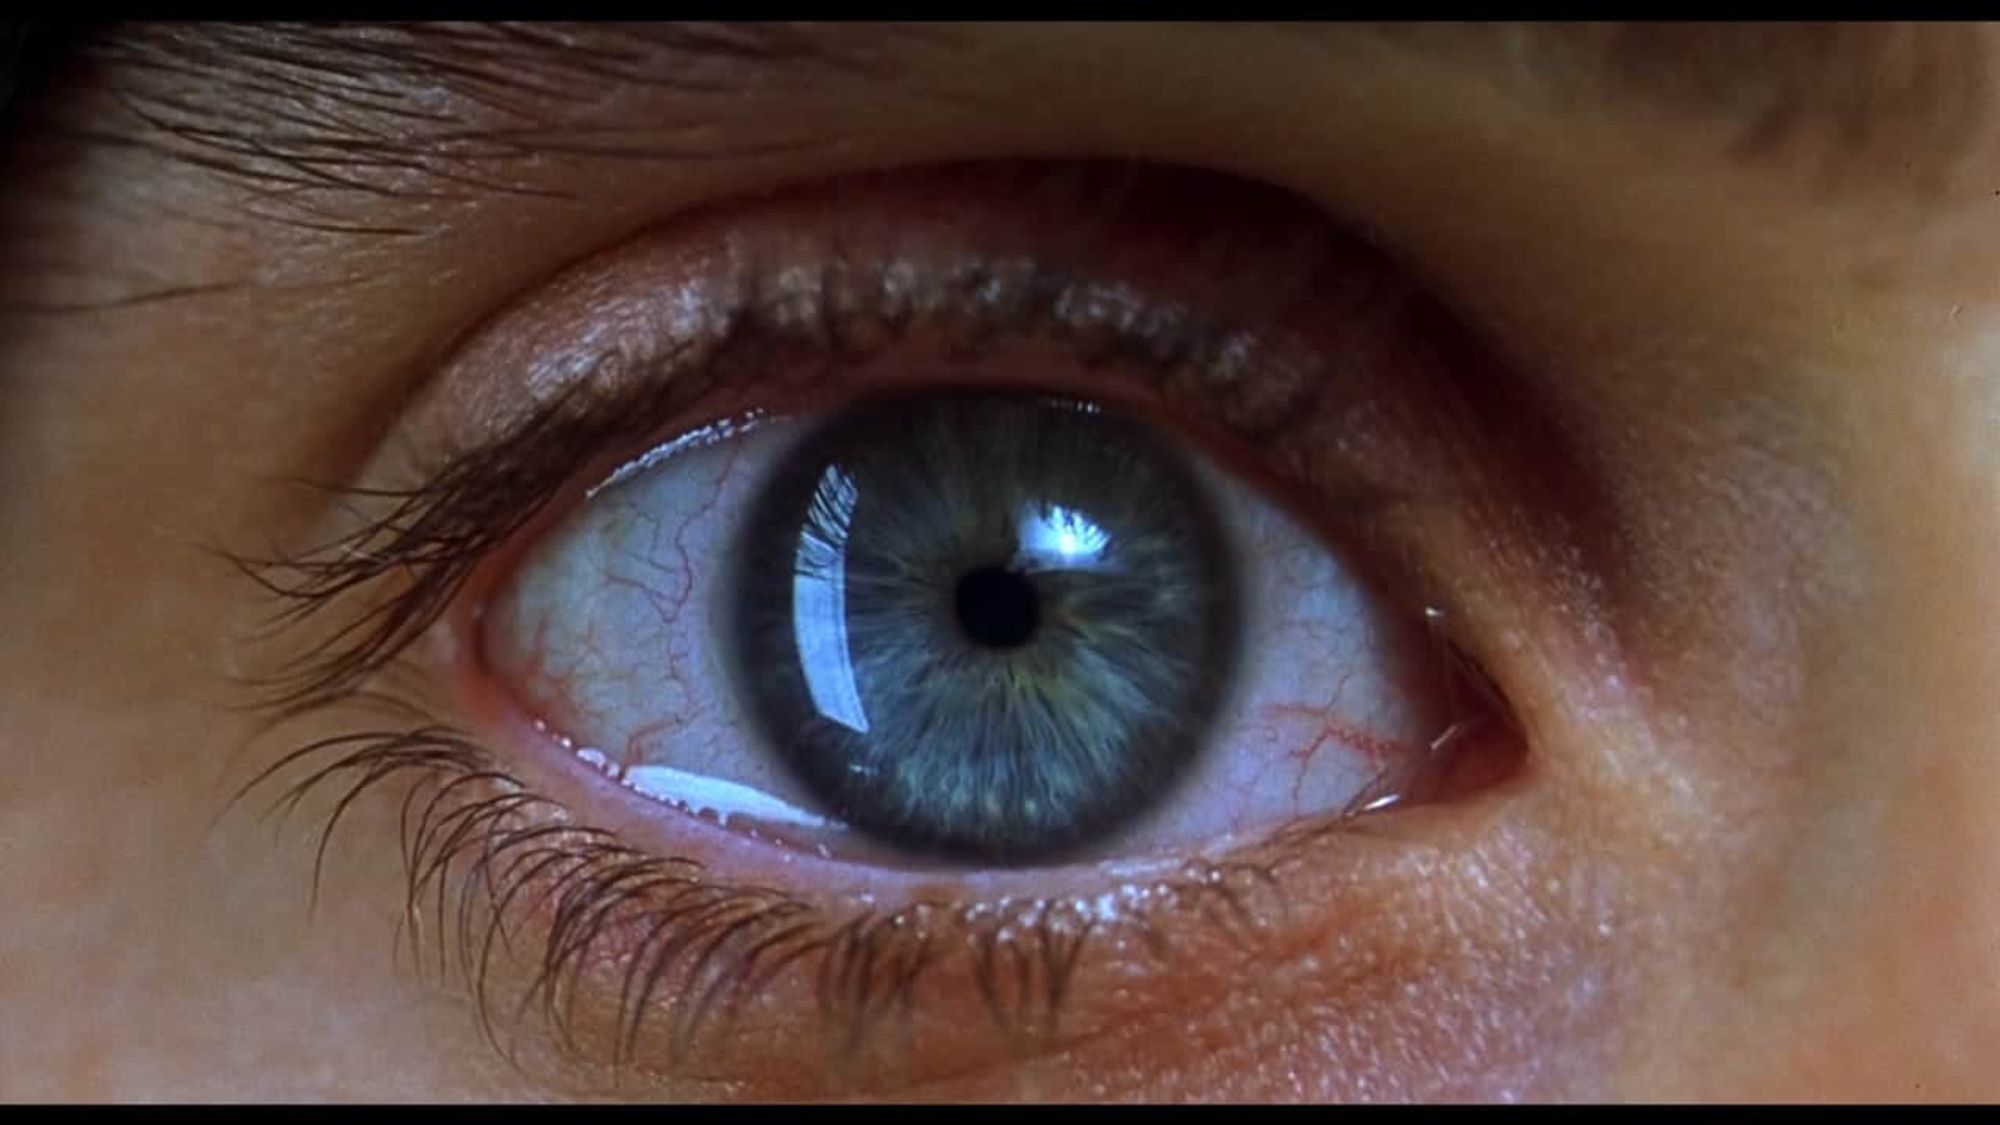
It’s way more intimate than a regular close-up (sometimes even uncomfortably so), but it has the power to make the viewer feel what the actor is feeling.
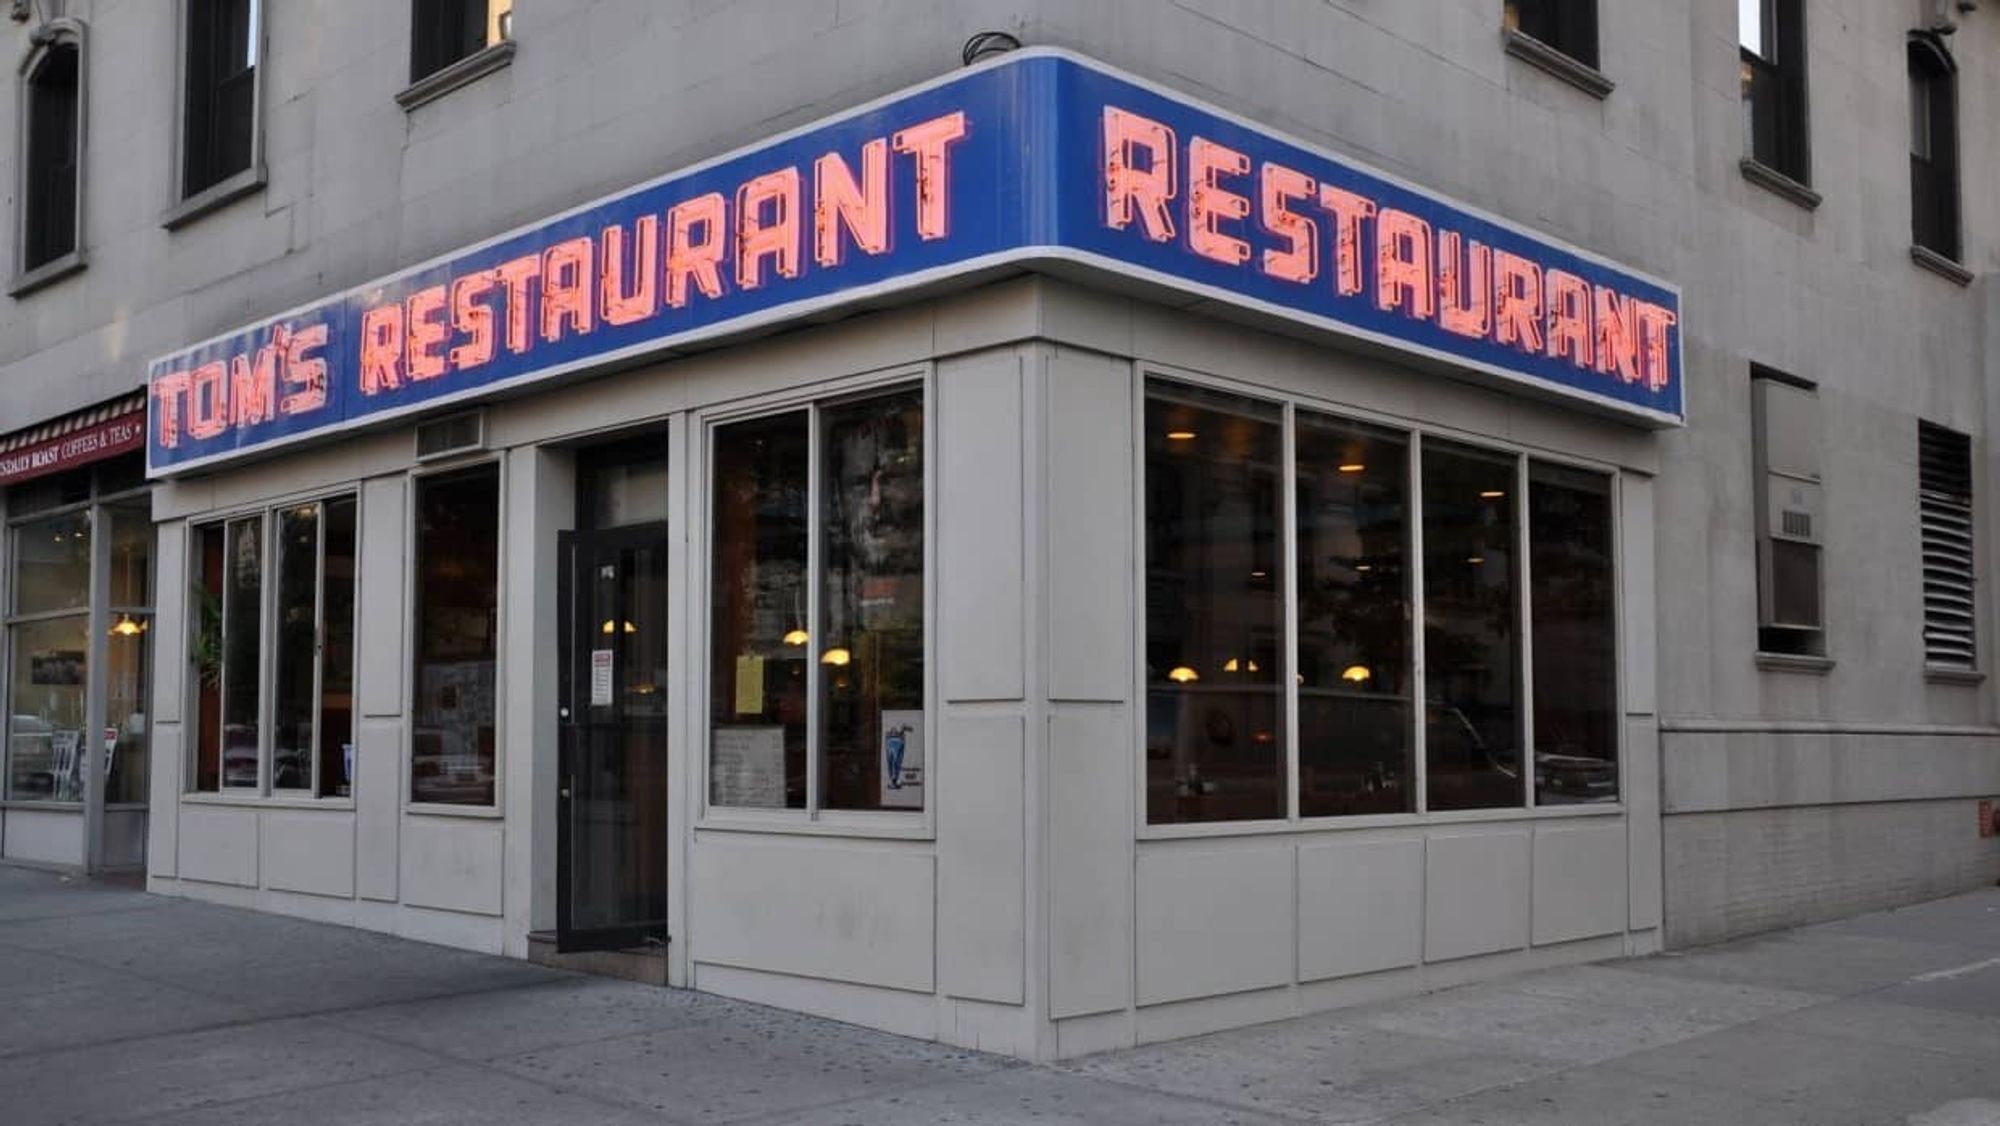
Establishing Shot
It’s where it all starts.
The establishing shot is not technically a shot type because it can be a mixture of different shot sizes.
But it is very important because it lets the viewer know the location and sets the tone for what’s to come.
It can be anything from an office building, hospital, or museum, to a traffic jam, a burned forest, or a house.
You all know this famous shot from Seinfeld:
Camera Shot Focus
It’s amazing how filmmakers can influence the feelings, thoughts, and experiences we, as the audience, have while watching their movies.
They can shift points of view as we learn new information, go to different locations or switch perspectives. And they achieve that through different focuses.
Depth of field (DOF) describes the size of the area in the shot where the object or character appears. This area is referred to as the field, and the size of that area is the depth of the field.
There are several camera shot focuses, each used as a unique storytelling tool.
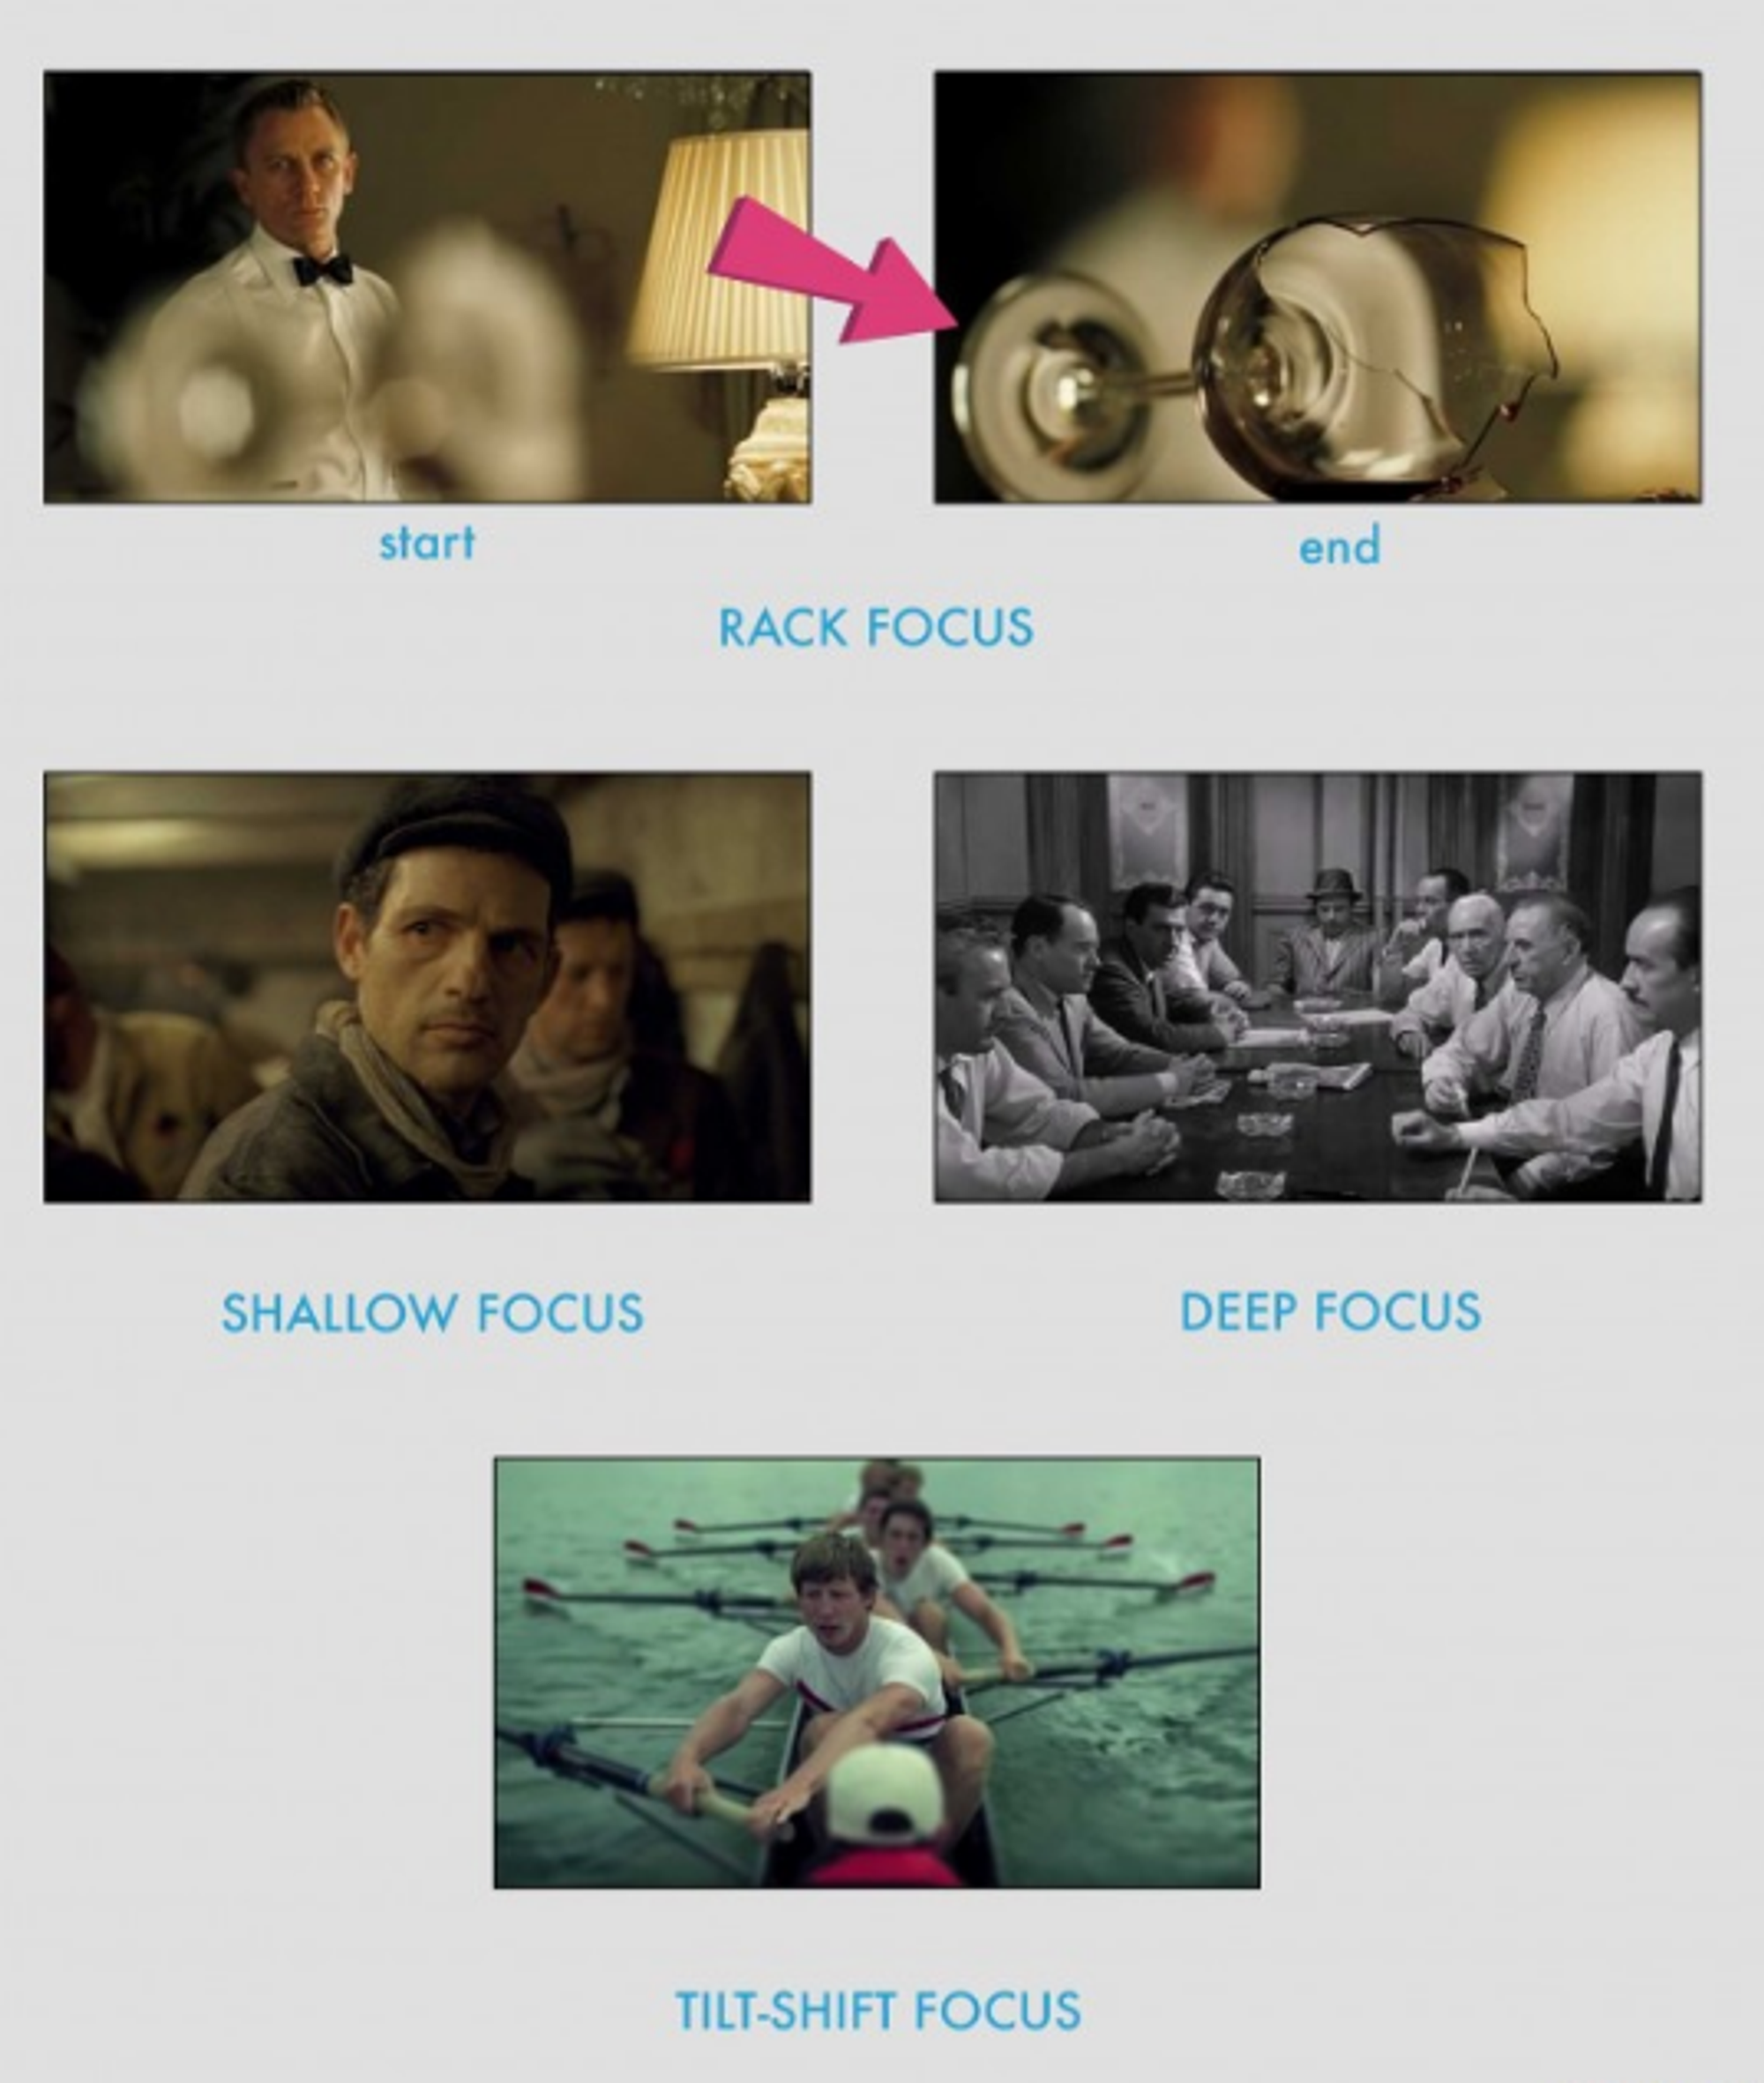

Here’s their breakdown:
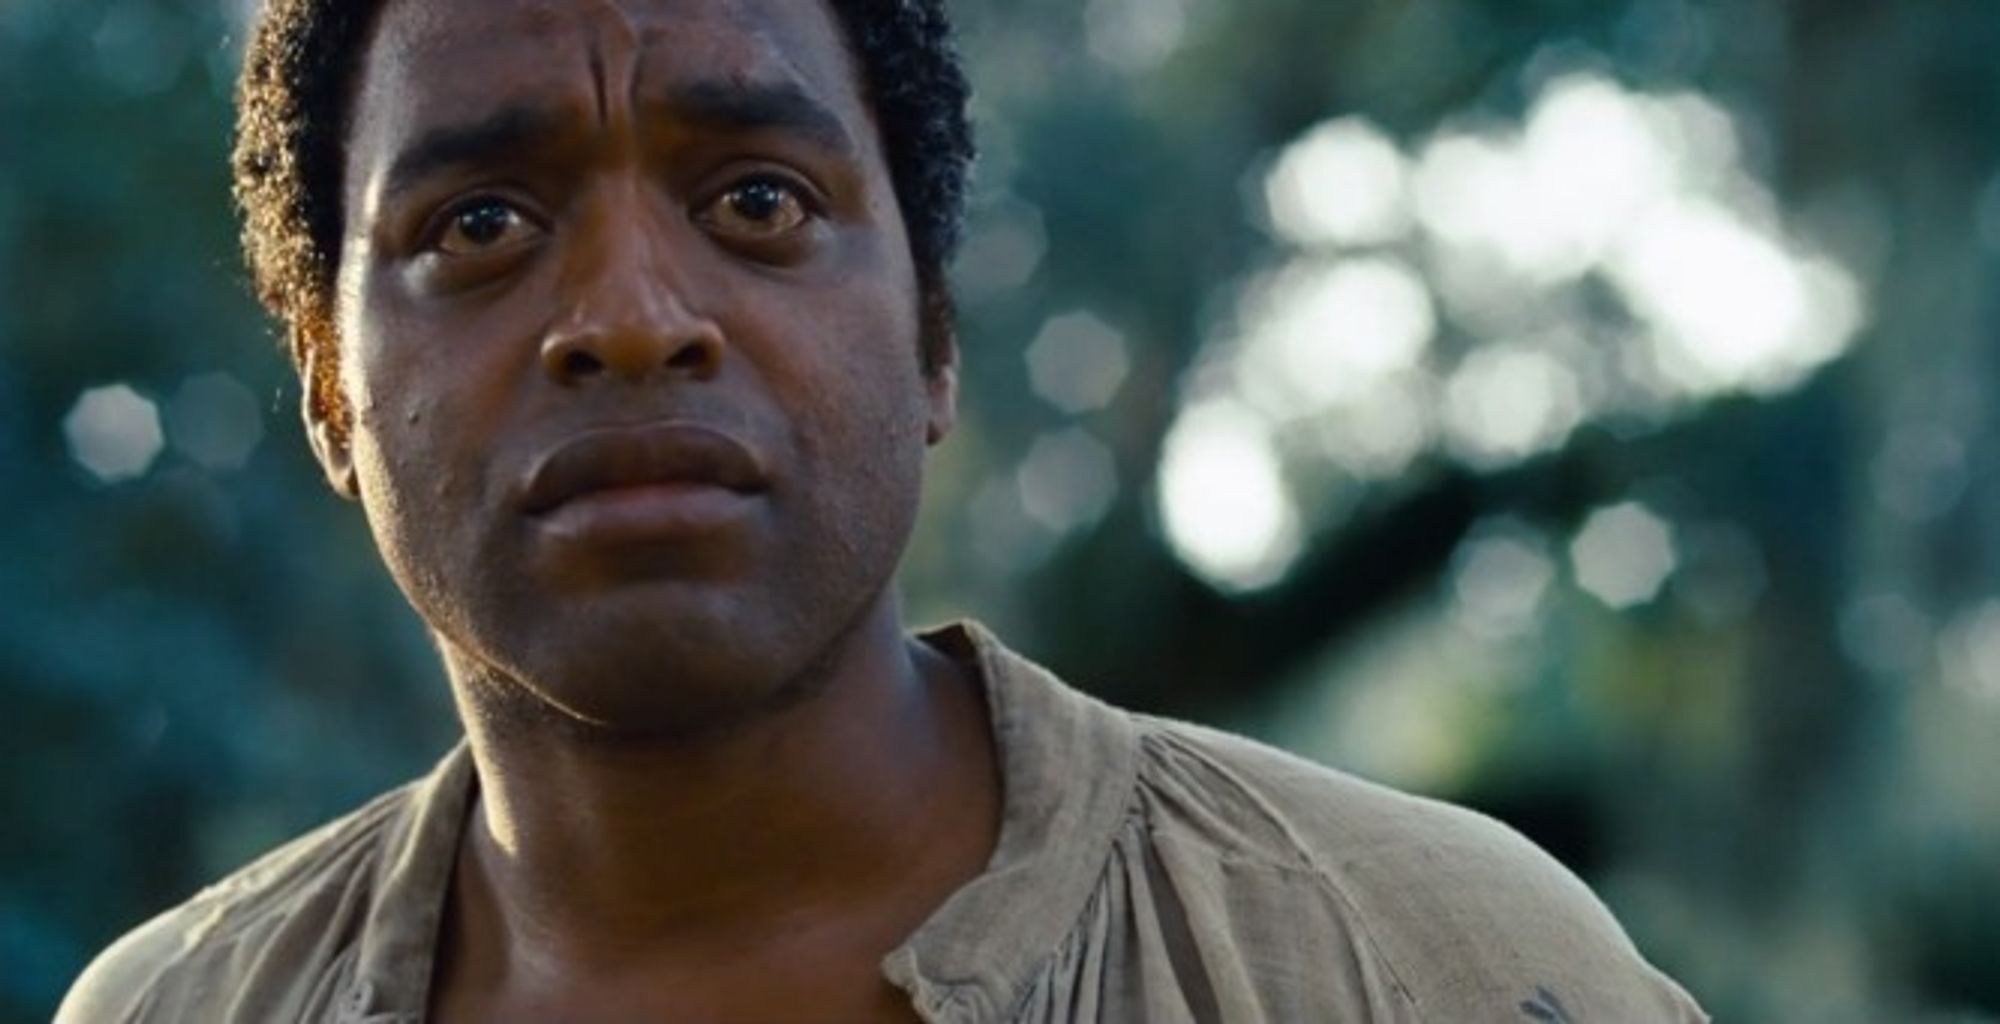
Shallow Focus
Shallow focus uses shallow depth of field - the object is in focus, and the background is blurry or out of focus. Here, the plane of focus (the space around the central point) is sharp but small, and the larger background is blurred.
This focus directs your eyes onto something specific or conveys emotion.
Take a look at this shot from 12 Years a Slave:
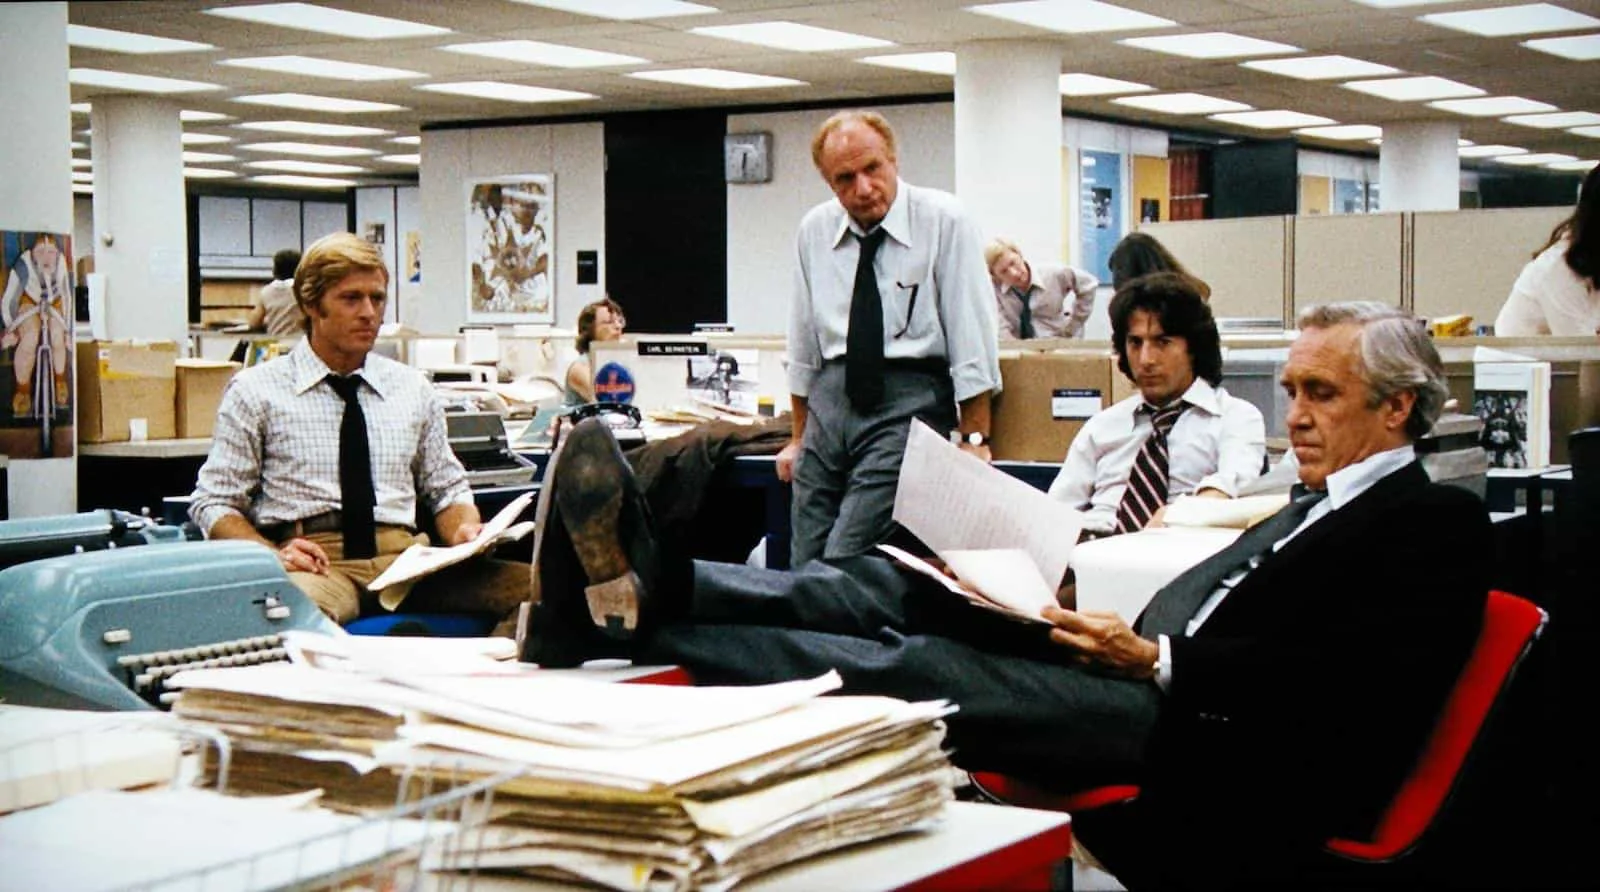
Deep Focus
Opposite to the previous one, everything in the scene is in focus in deep focus.
You can use it when you want the audience to feel the scenery or a scene element, like in All The President’s Men:
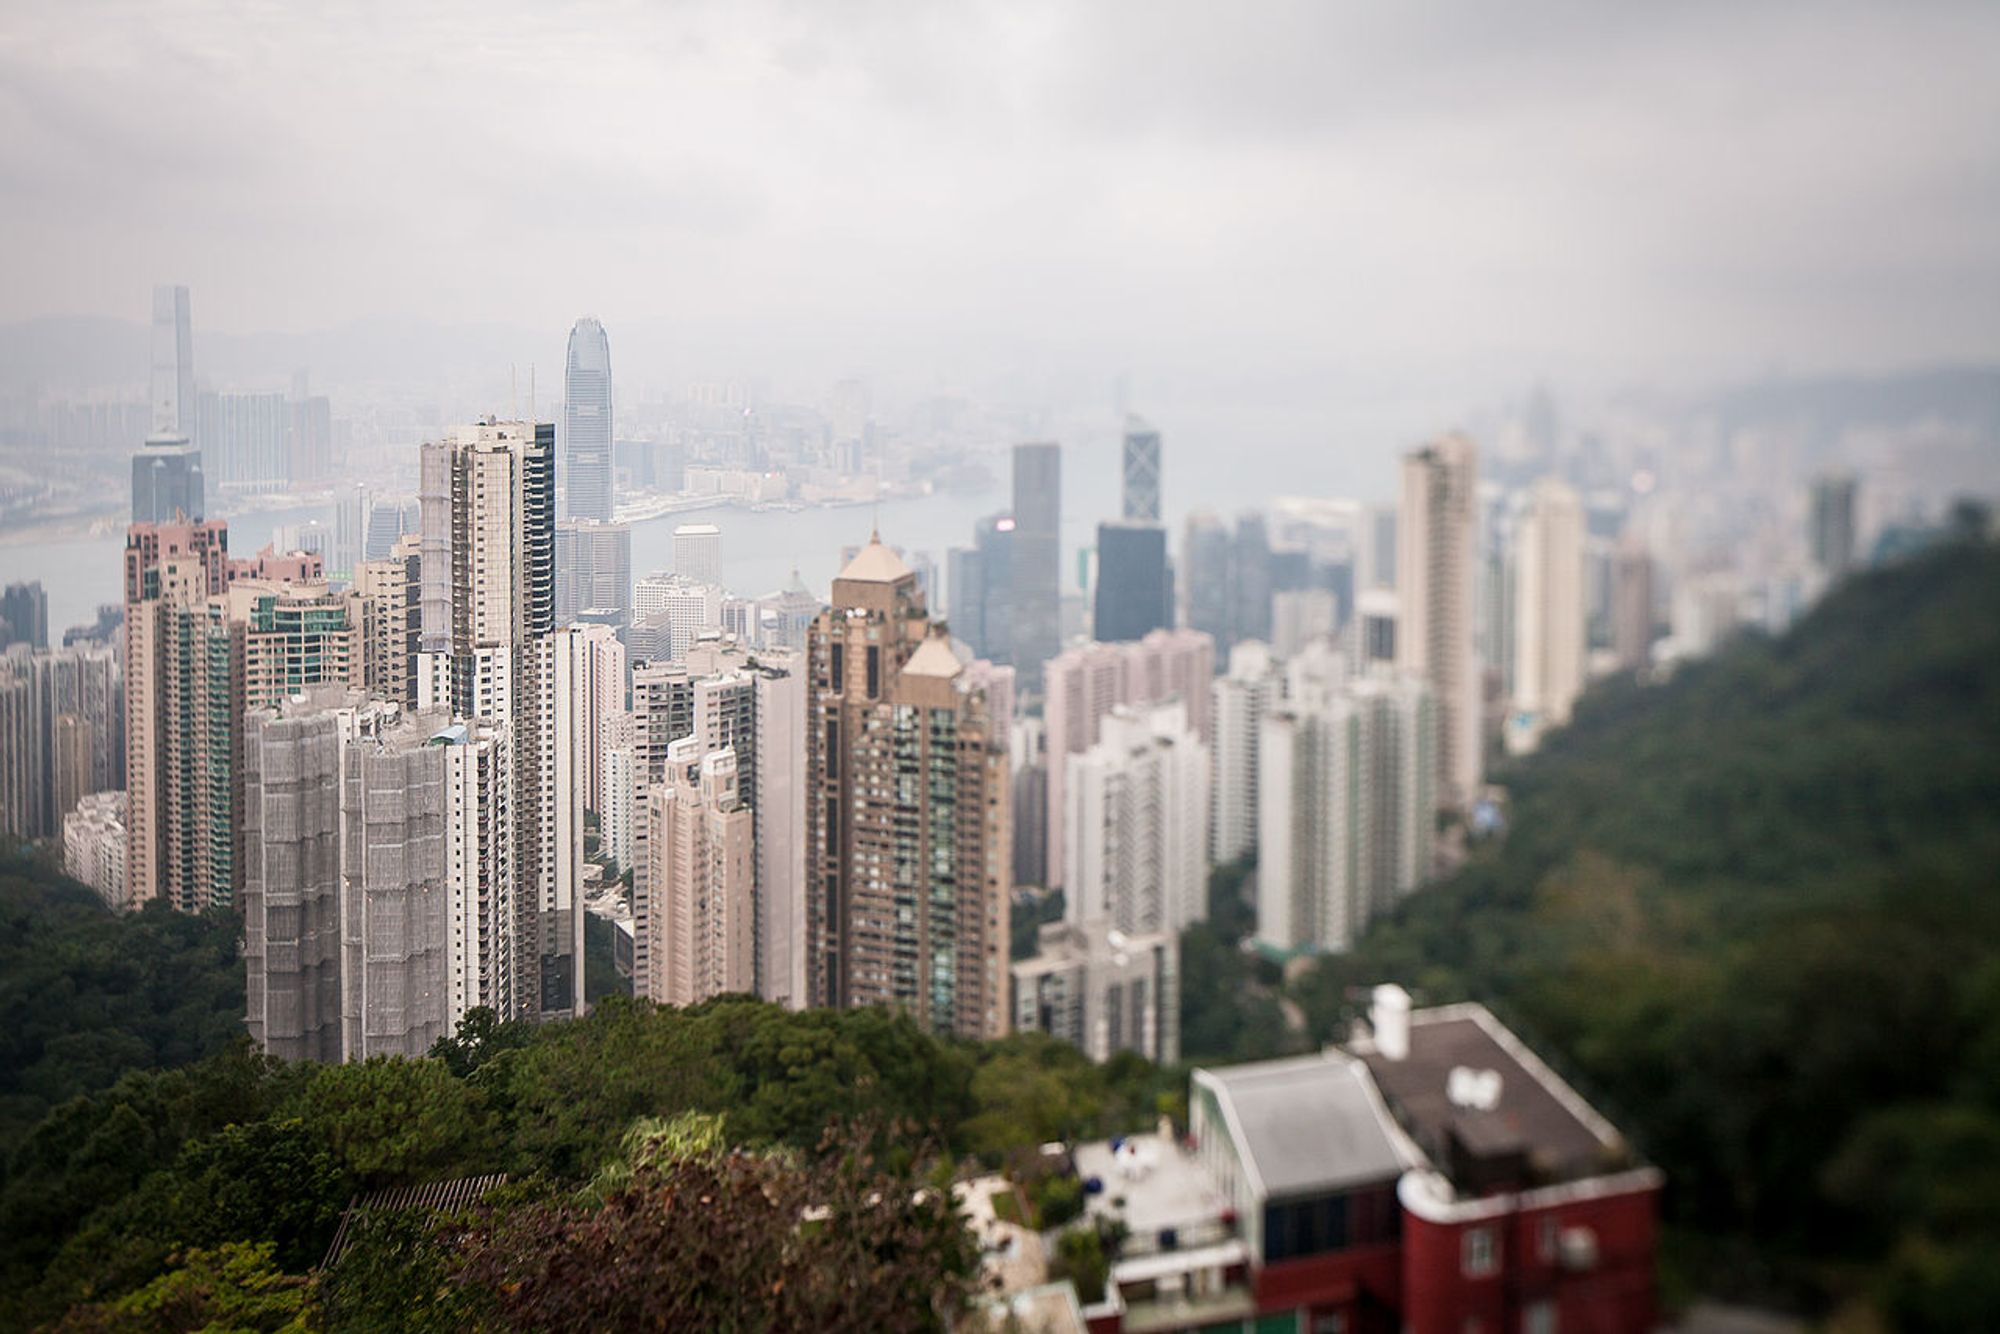
Tilt-Shift
A tilt-shift focus gives selective focus by rotating perspectives. It can help create a distorted image with part of the shot being focused and other parts not.
This is often used to depict the scenes of dreams. Also it can maximize or minimize the focus on one point, as in this image of Hong Kong:
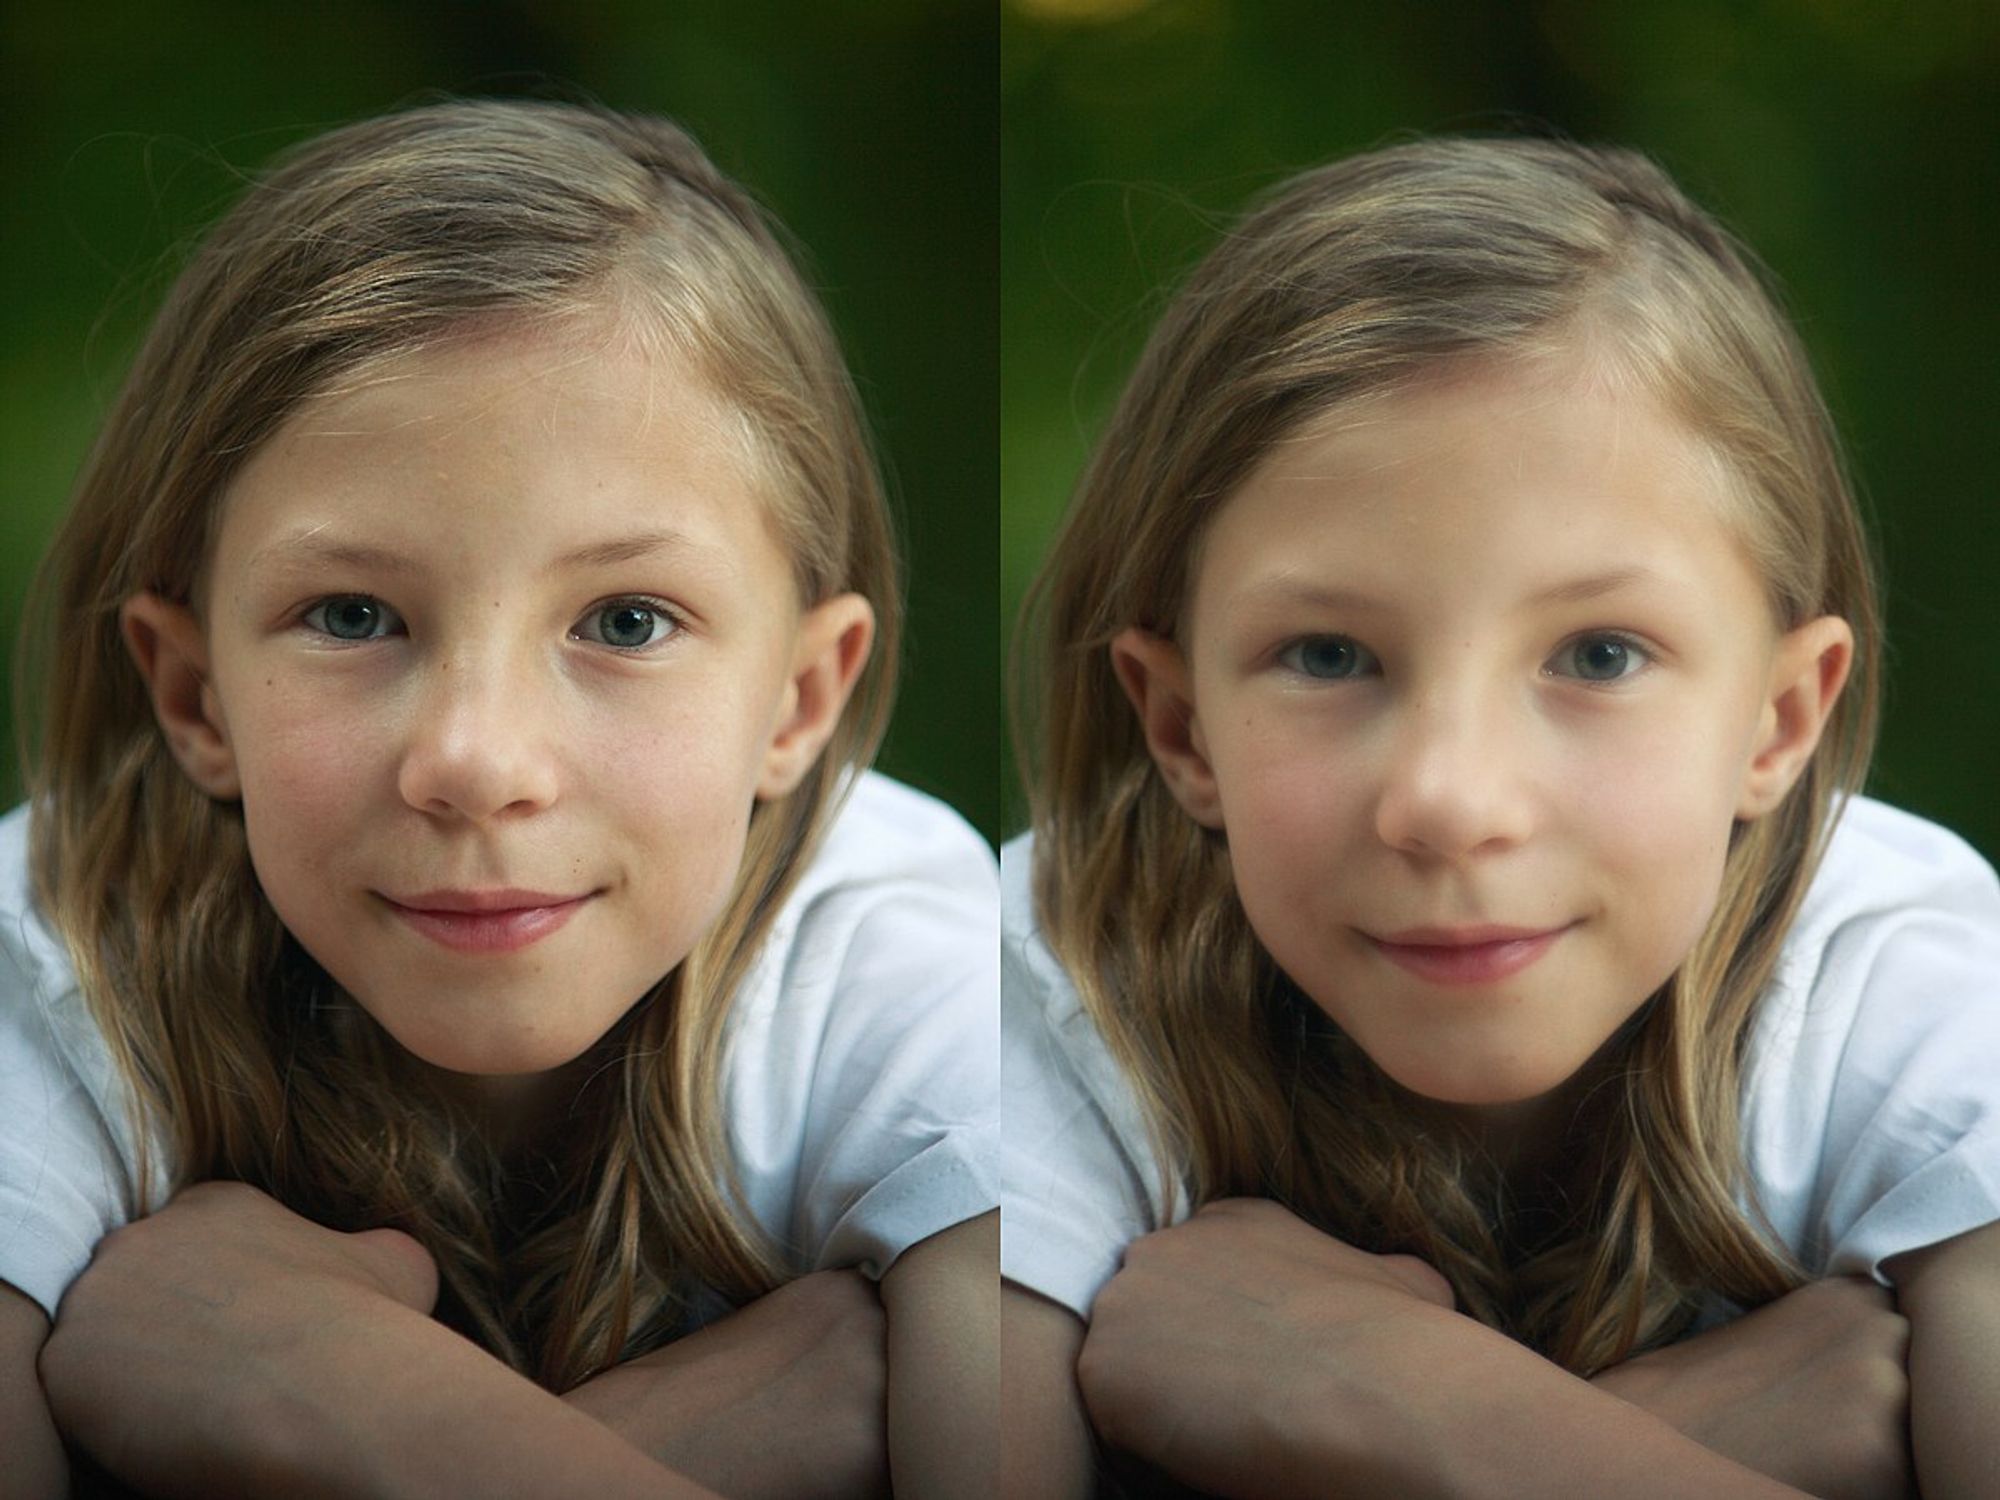
Soft Focus
Here’s another one perfect for showing a dream or memory.
Contrary to deep focus, where everything is in focus, or a shallow one, where one part is focused on, the soft focus has nothing in a complete and sharp focus.
It’s often used for portraits to make the face warmer and softer:
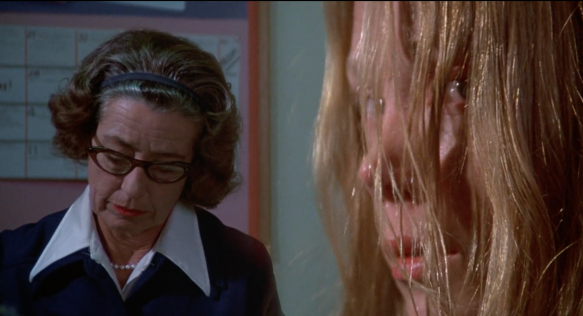
Split Diopter
The split diopter allows you to have two simultaneous focal lengths.
This means you can have a shallow focus in the front AND in the background, with the middle out of focus.
This is unnatural for the human eye because it can focus only on one thing. So, this type should be used only when truly necessary.
Here’s an example of a split diopter from Carrie:
Camera Shot Angles
The camera shot angle shows the location of the camera from where it takes shots.
The camera's position can affect how the viewers see the scene and the character. Sometimes, the scenes are shot from several camera angles to emphasize the emotions and cinematic effect.
Check out this cheat sheet of all the different camera angles:
.png?id=3575205e-b6c7-4a62-aca6-575670187b20&table=block)
![Ultimate Guide to Camera Angles: Every Camera Shot Explained [Shot List, Ep. 3]](https://i.ytimg.com/vi/wLfZL9PZI9k/hqdefault.jpg)
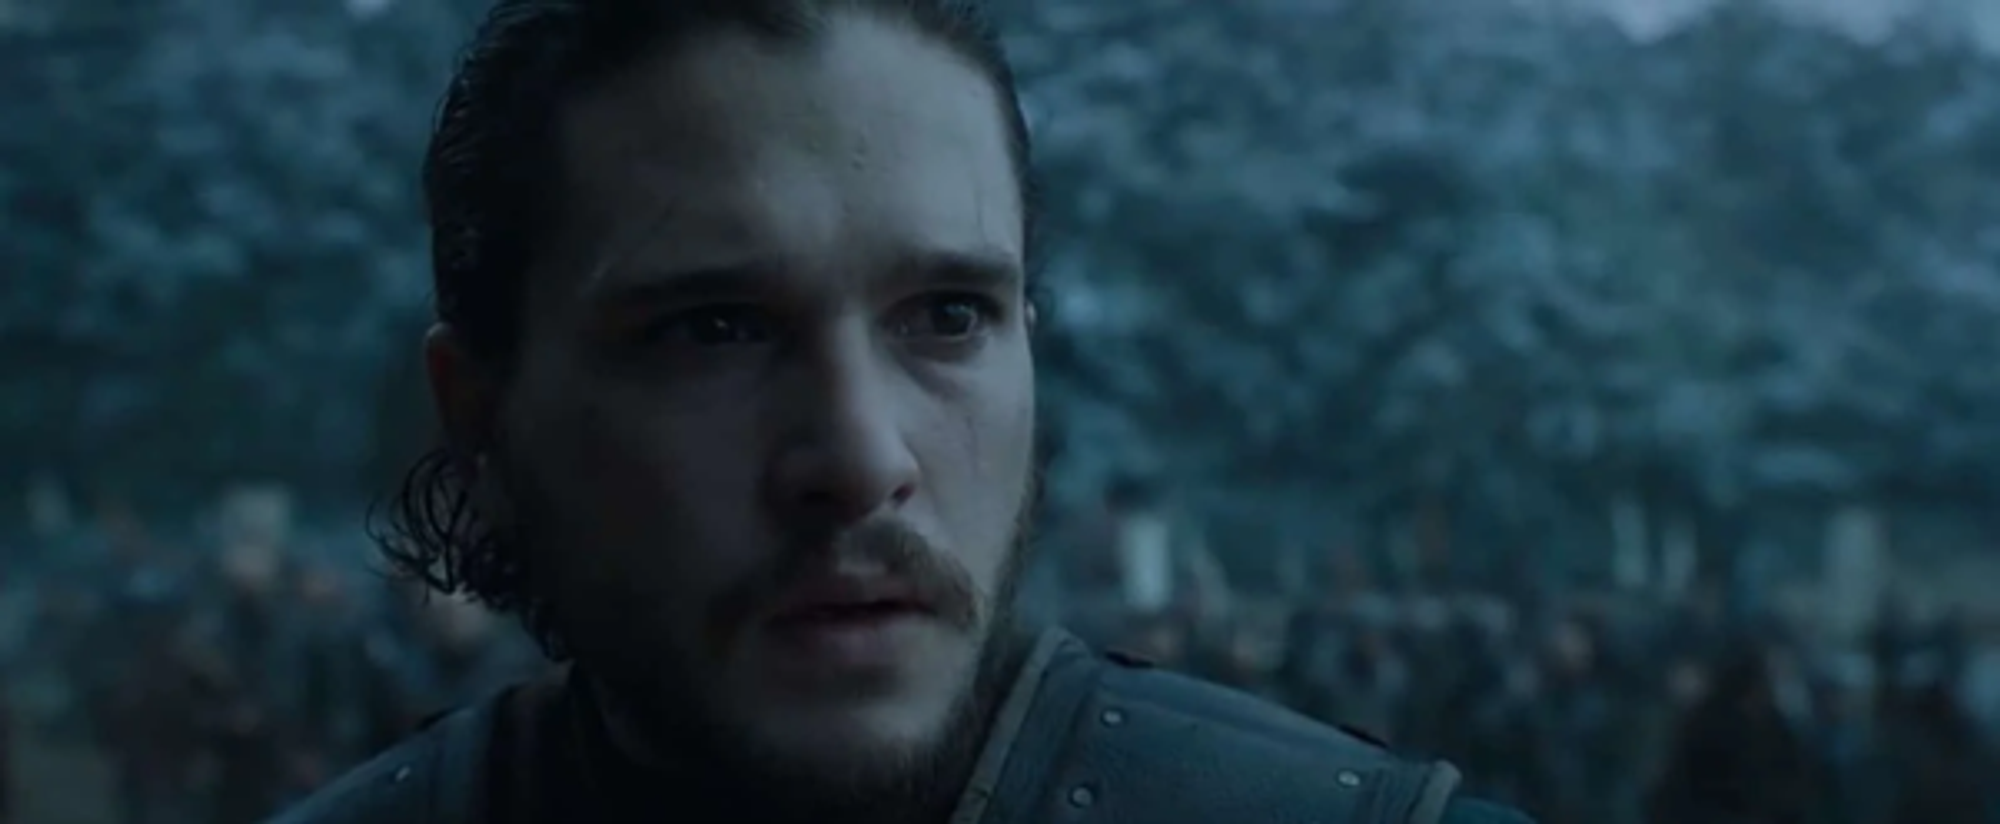
Eye Level Shot
This is the most common height. The subject is at eye level and in a neutral perspective, not superior or inferior. It mimics the way we see people in real life.
Basically, think of most shots of John Snow’s surprised face:
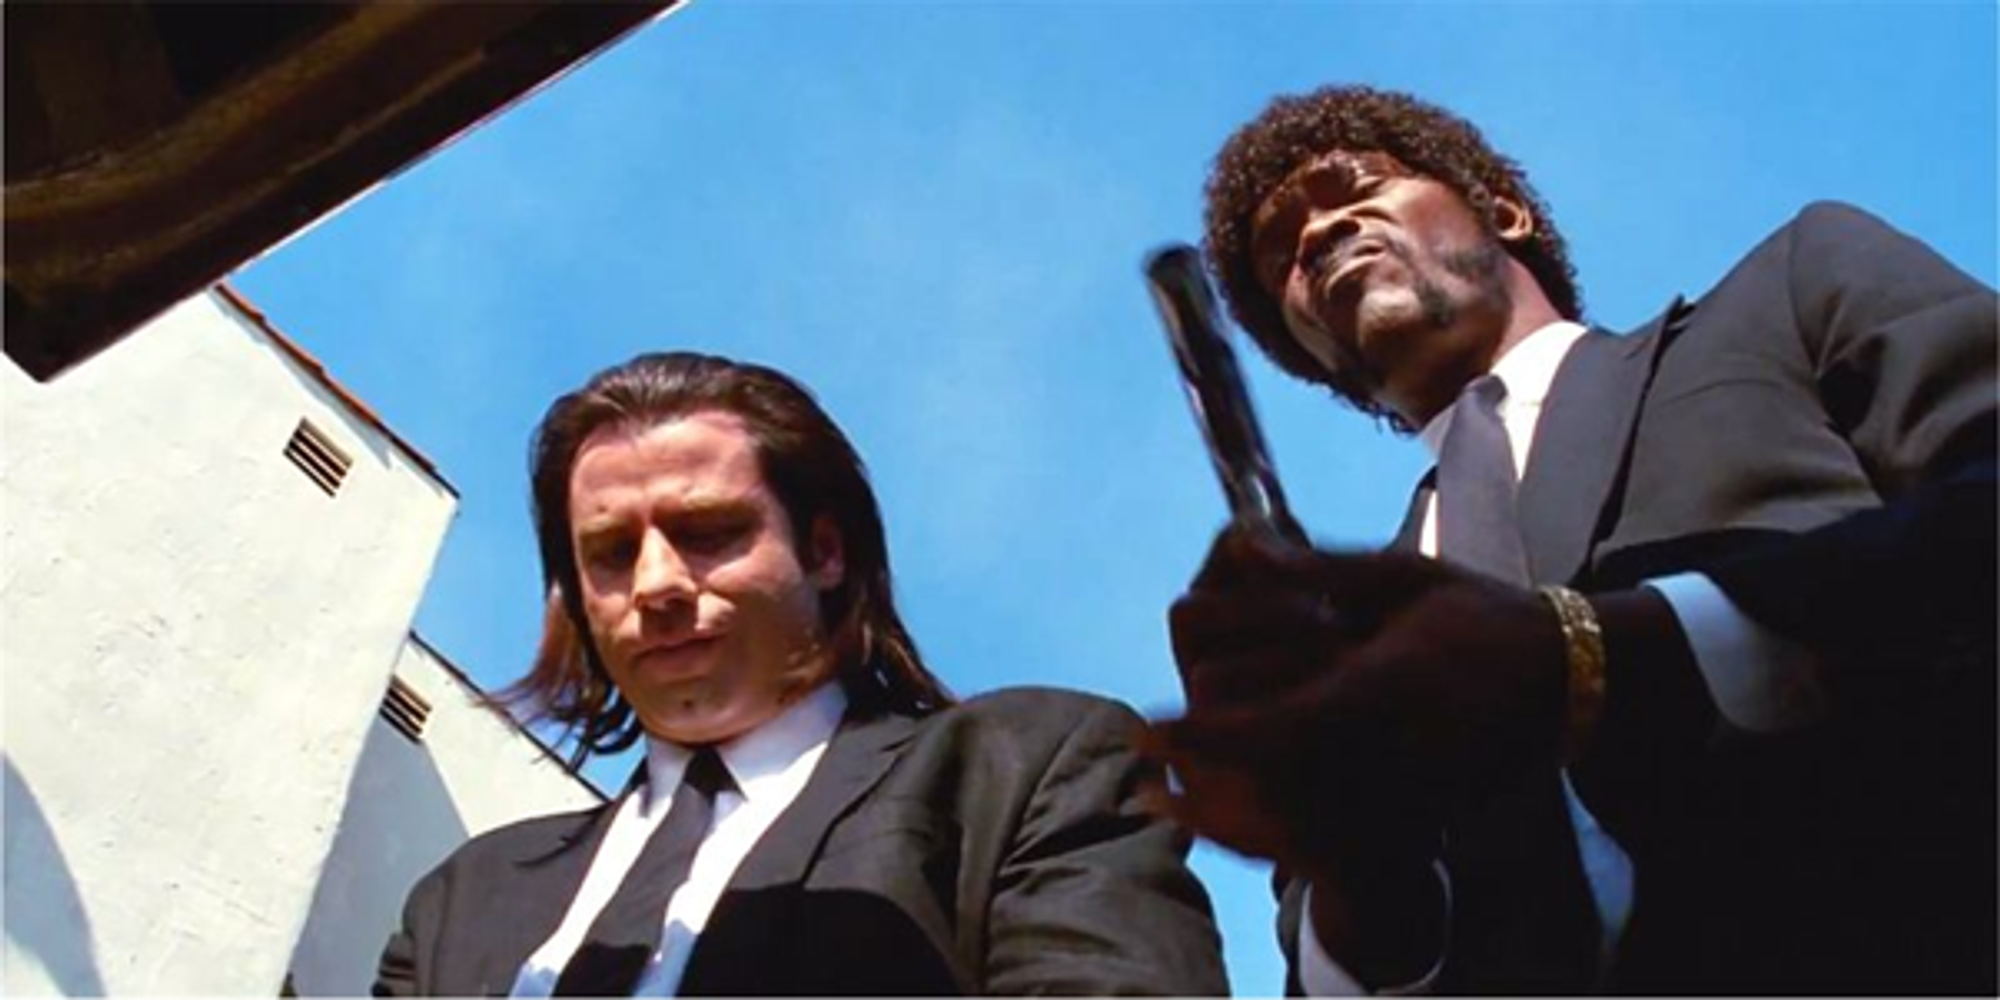
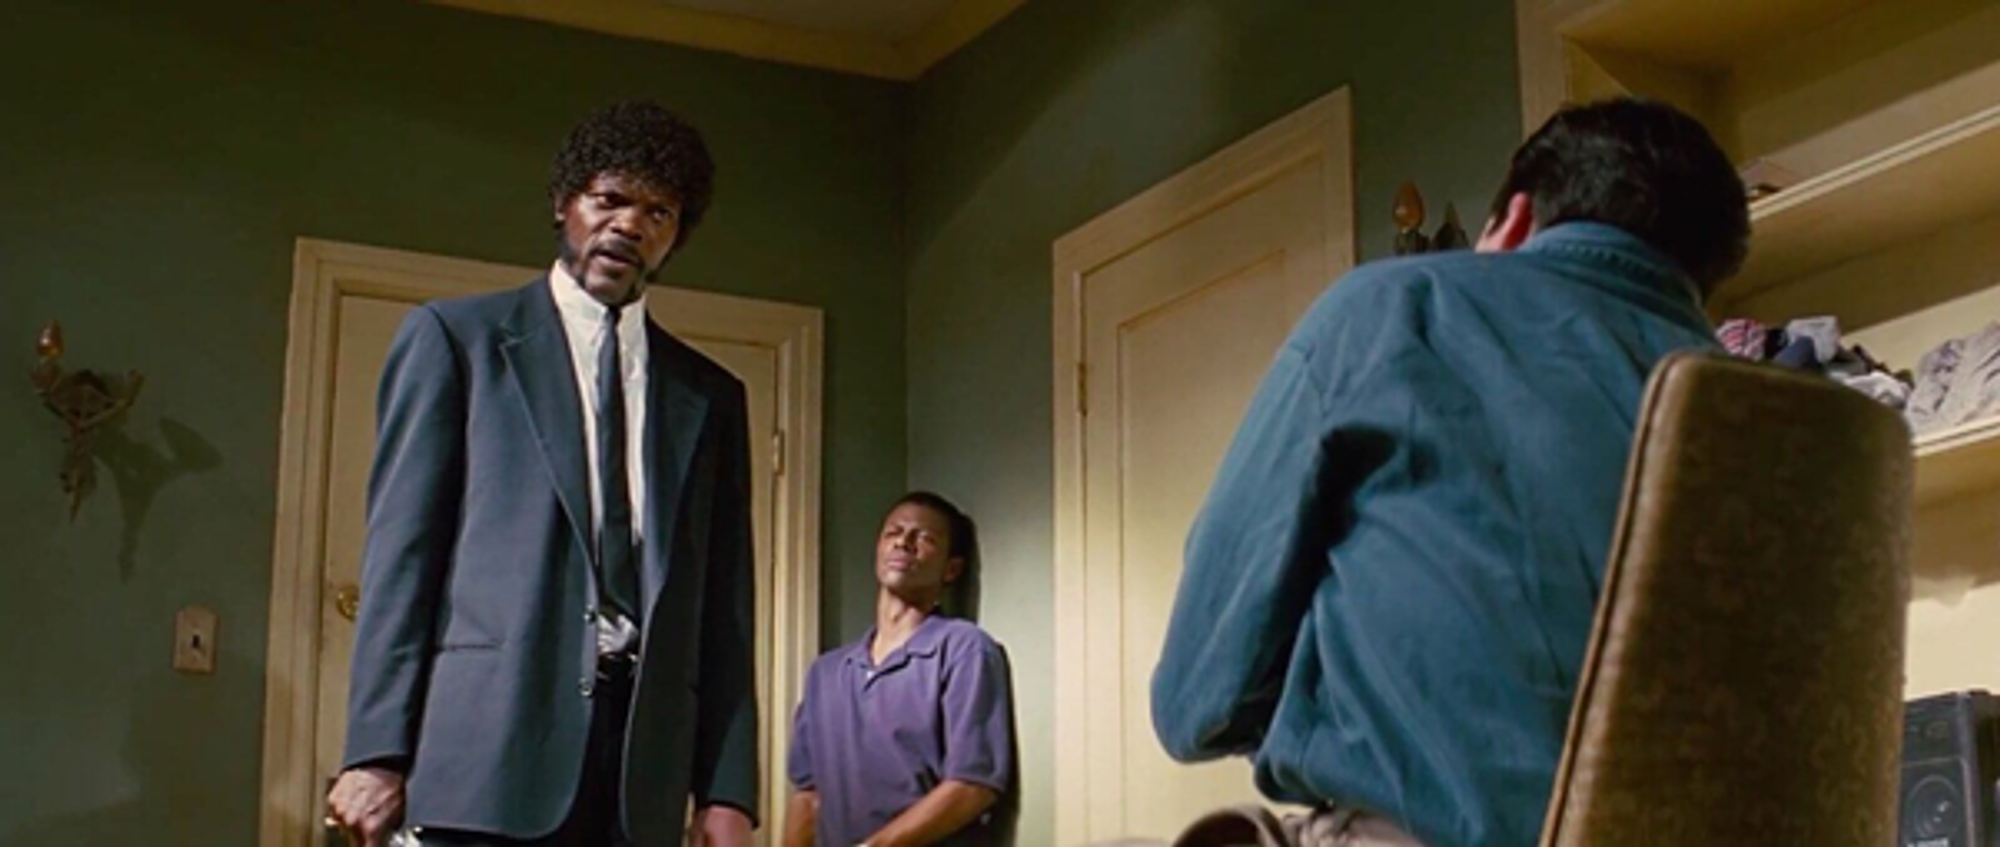
Low Angle Shot
In this shot, the camera looks up at the subject to emphasize the power dynamics between the characters.
Usually, the superior character is framed from a low angle, making an inferior look like they look up to them.
Remember this icon shot from Pulp Function?
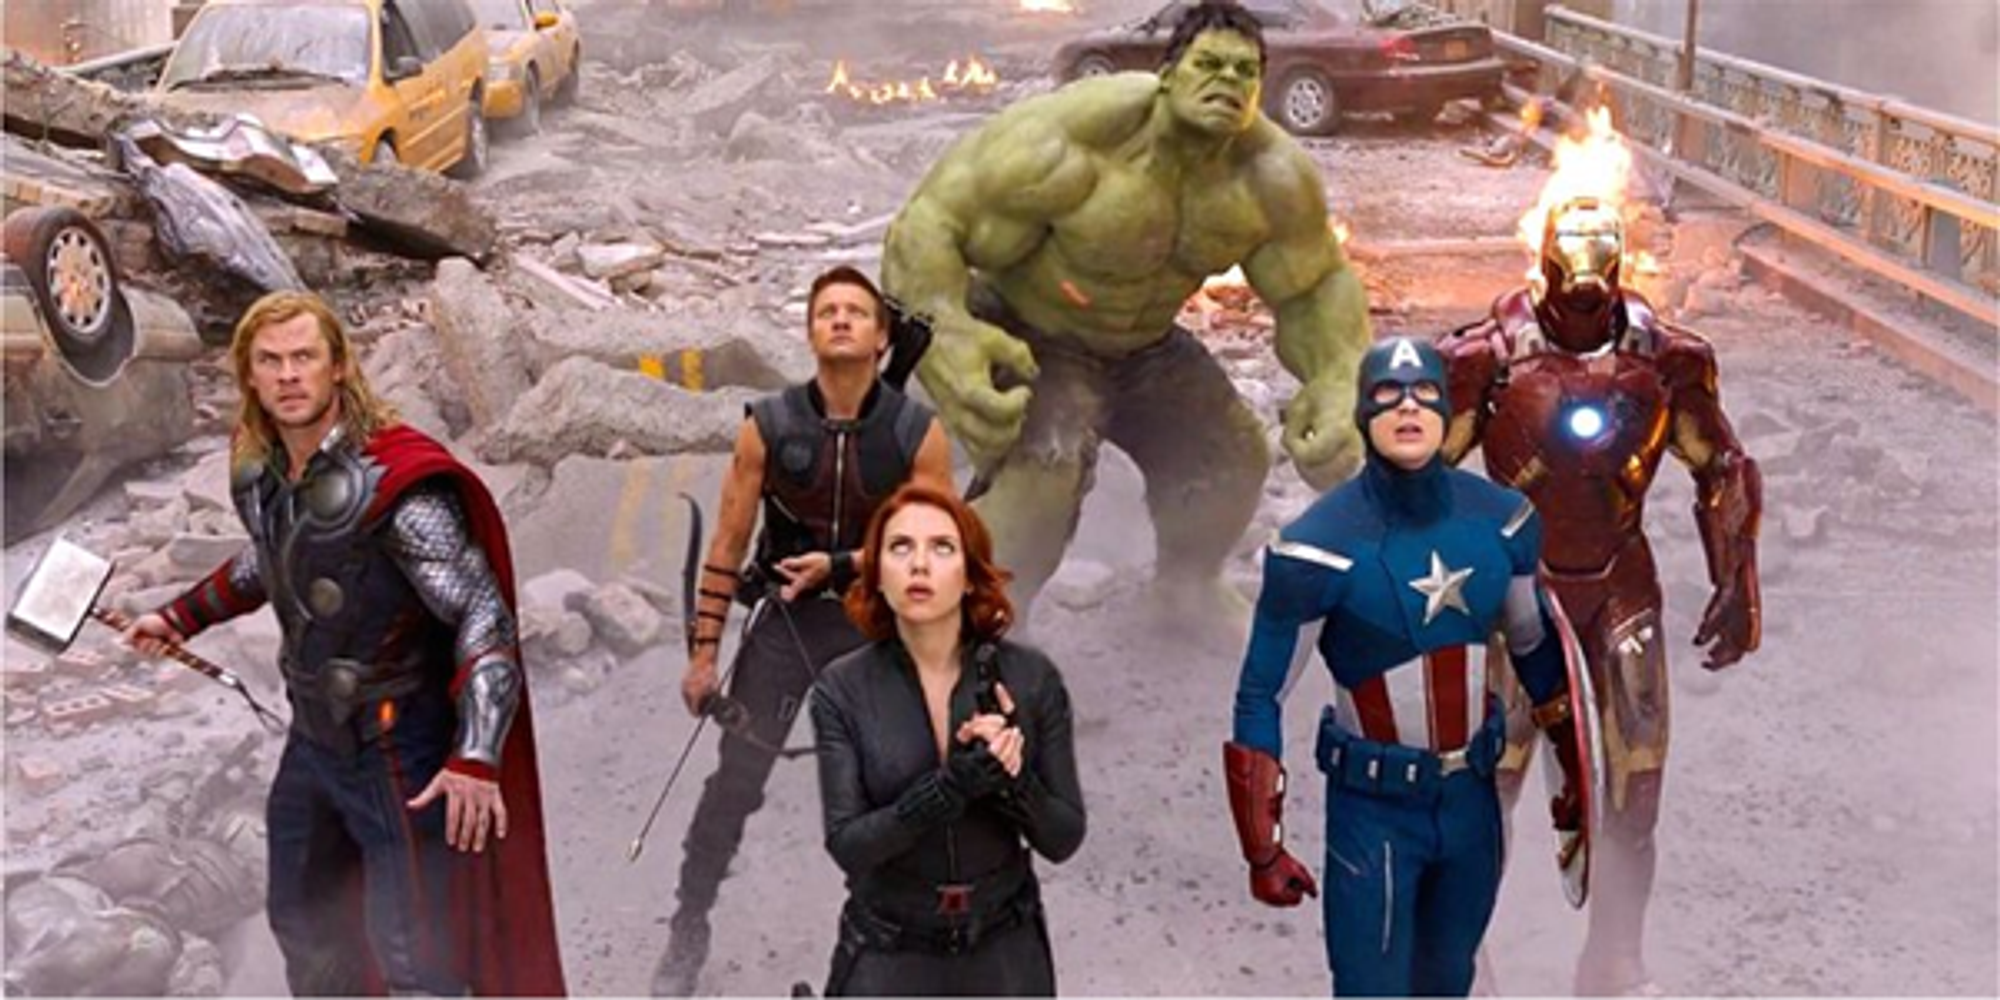
High Angle Shot
This is the opposite of the previous one.
The camera shoots from a high angle and points down at the subject creating a feeling of inferiority.
But you can see in this video that different creative expressions of this type of angle depend on the context.

The movie The Avengers has an excellent example of the high-angle shot:
Hip Level Shot
So, the camera is positioned at hip level.
Here’s a hip-level shot from Punch-Drunk Love:
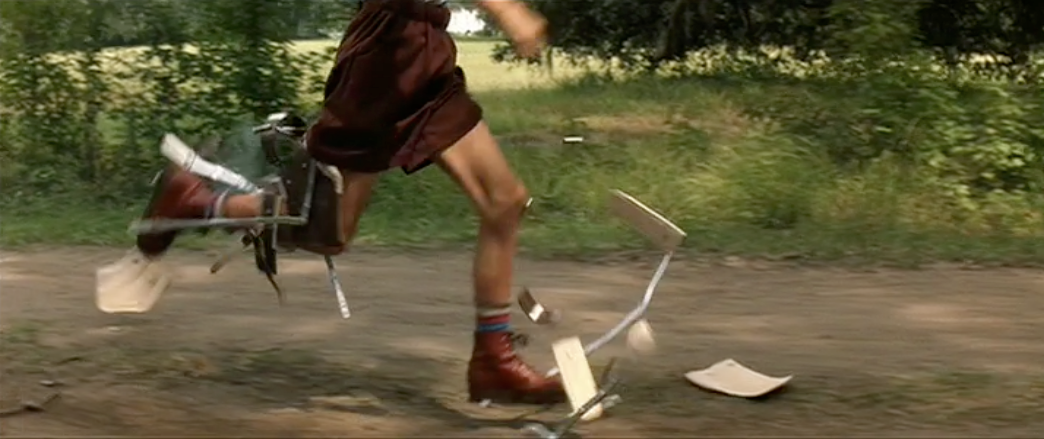
Knee Level Shot
Again, the camera’s height is at knee level.
Paired with a low angle, this shot can emphasize the characters’ superiority.
Remember this scene from Forest Gump:
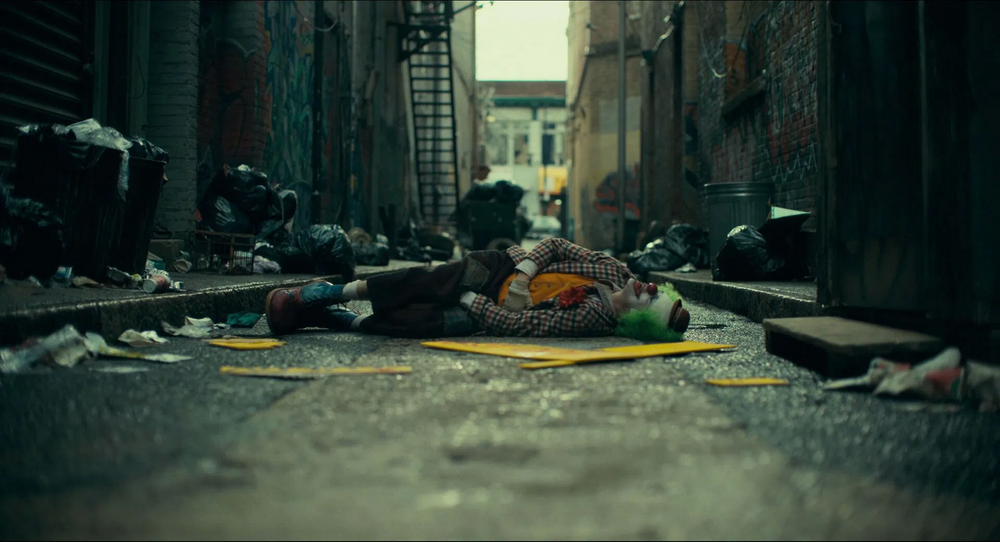
Ground Level Shot
The camera’s height is on the ground level, capturing what is happening on the subject's ground.
Here’s an example from Joker:
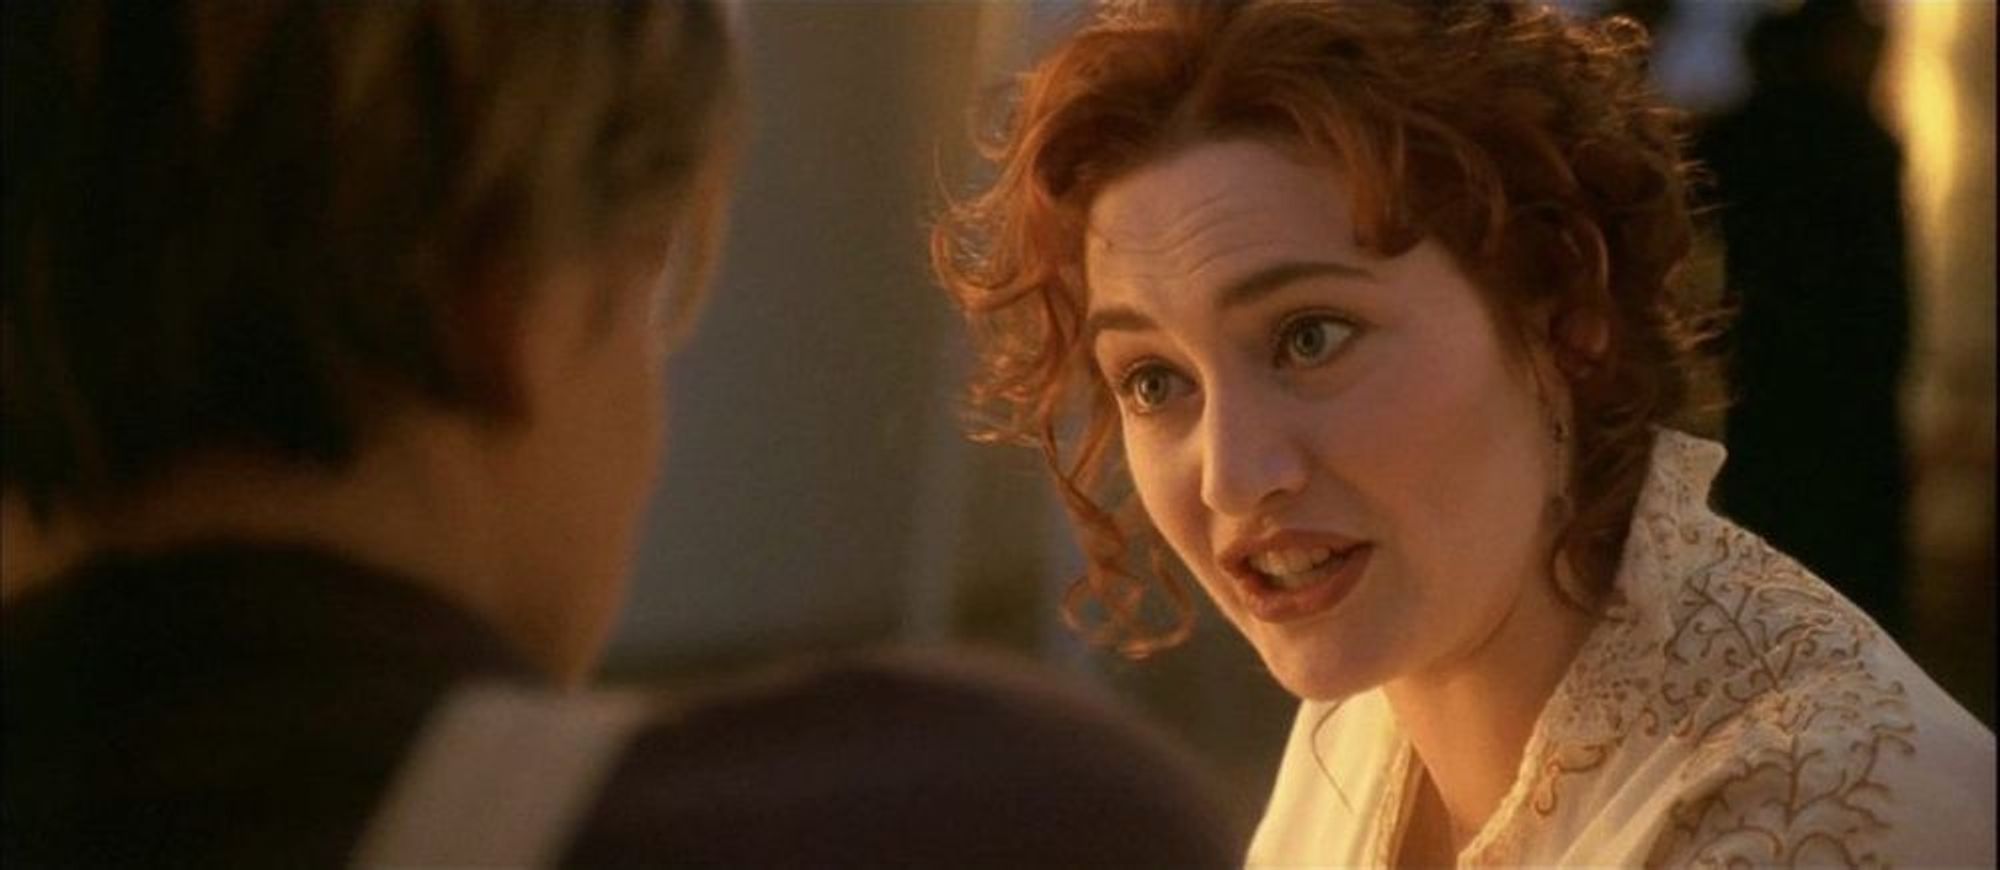
Shoulder-Level Shot
This shot is even more common than the eye-level one, making the subject look shorter.
The camera is at the height of the character’s shoulders.
It can emphasize the feeling of superiority when paired with a low angle, as in this shot from Titanic:
Dutch Angle Shot
Here, the camera is tilted to one side. As the horizon lines are tilted in one way, this creates a sense of disorientation.
Here’s a perfect example from Thor:
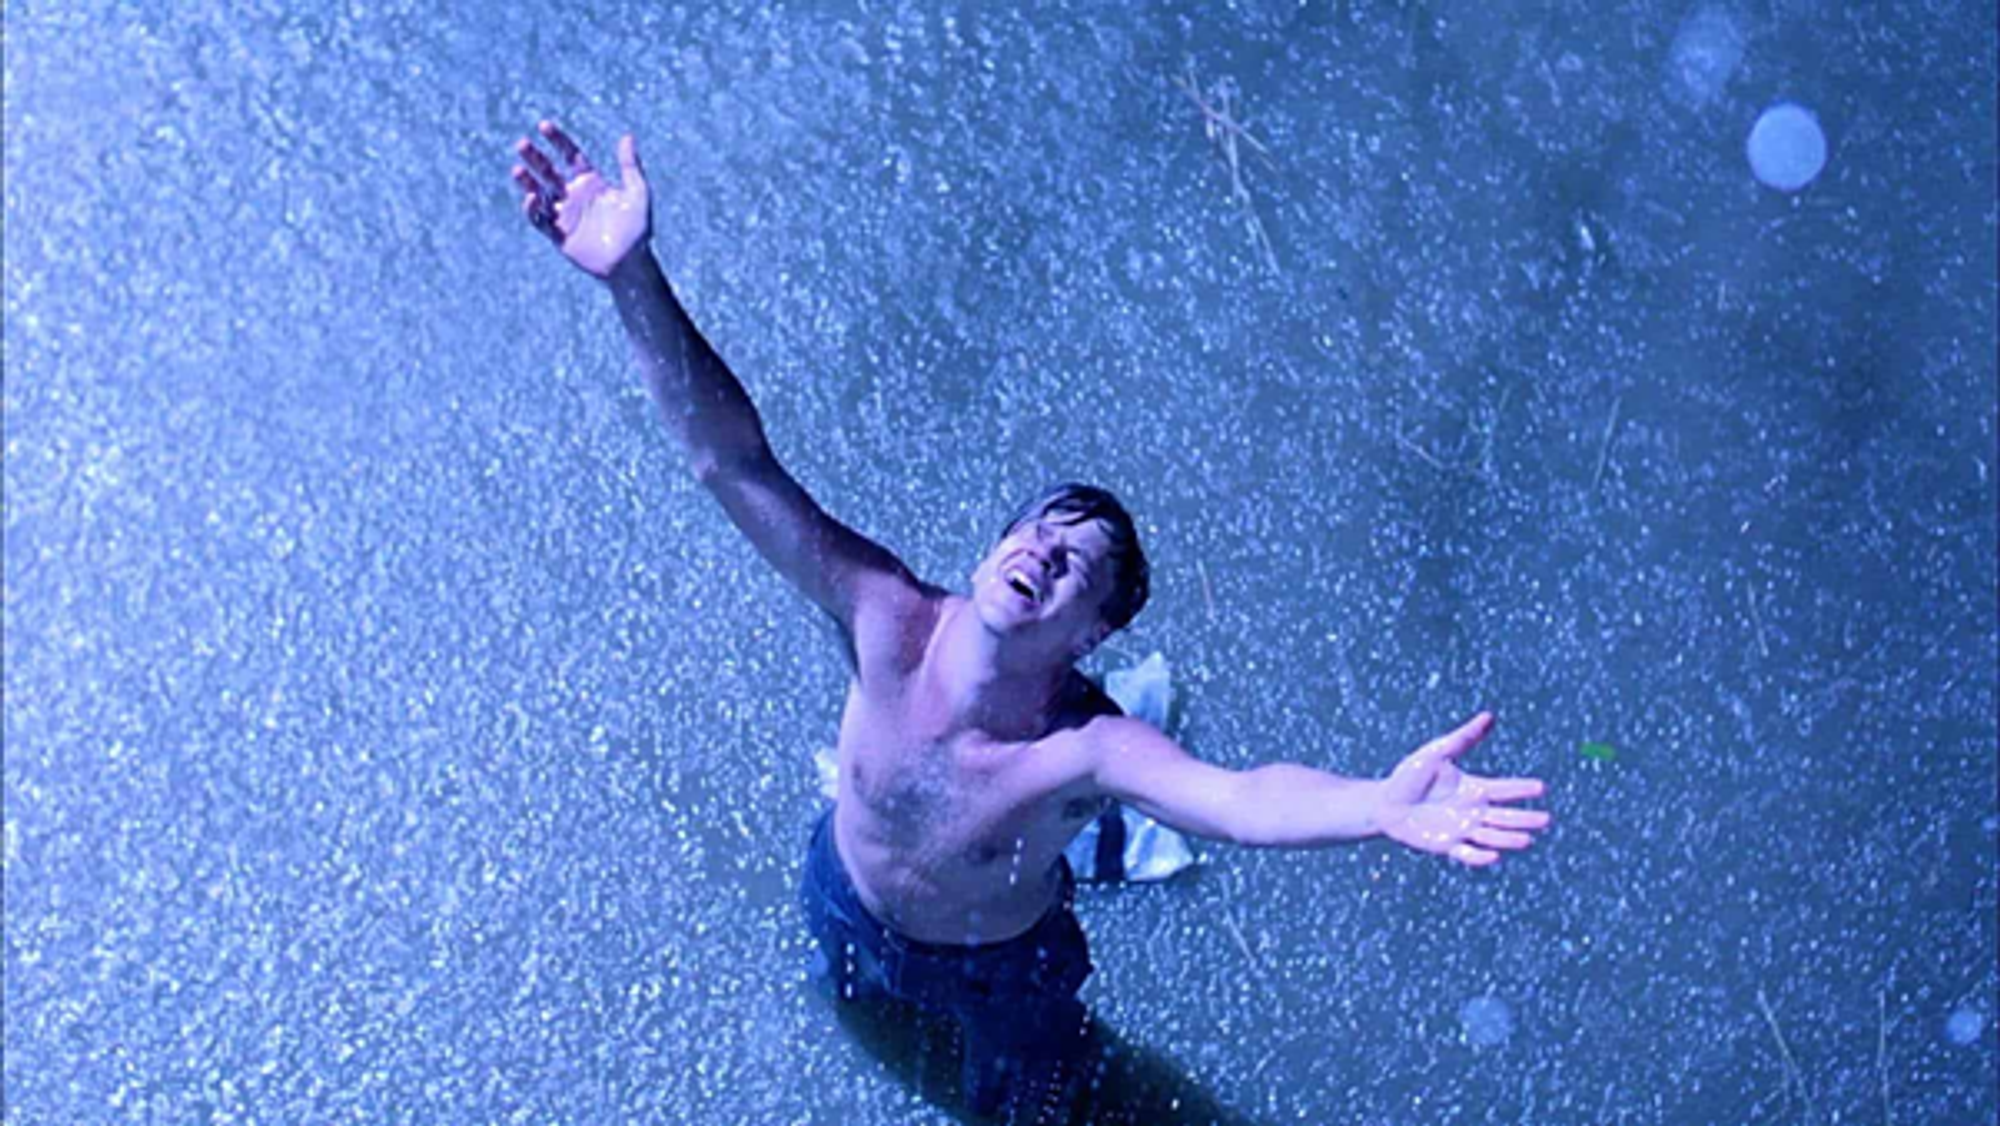
Birds-Eye-View Shot / Overhead Shot
As the name suggests, this shot is taken from way up high. It looks down on the subject and shows the scenery around them.
It’s perfect for creating a sense of scale or movement.
That’s exactly what producers did in this shot from Shawshank Redemption:
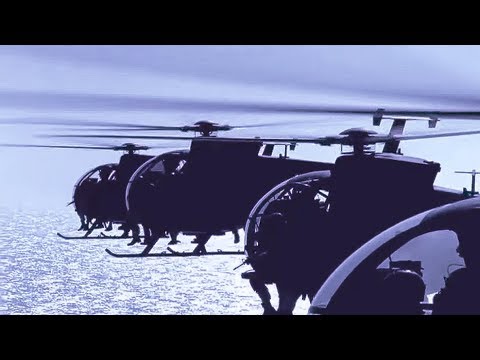
Aerial Shot / Helicopter Shot
This shot is taken even higher than the previous one.
It’s usually filmed from a helicopter or with a drone and shows a large part of the scenery, as in Black Hawk Down:
Final Thoughts
Learning what different types of camera shots, angles, and focuses exist is essential for excellent storytelling and creative camera work.
By understanding which types evoke emotions, you can make the audience feel things you want to convey and bring the objects and characters closer to them.
So, take some time to study all of this and make your shots more memorable than ever.